Hangman
5.9+,
Trad, 150 ft (45 m), 3 pitches,
 Avg: 2.9 from 74
votes
Avg: 2.9 from 74
votes
FA: unknown
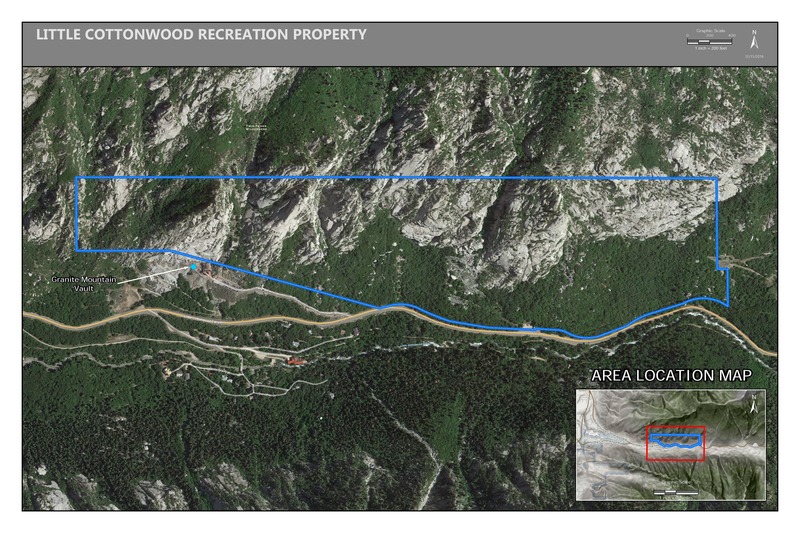
Utah
> Wasatch Range
> Central Wasatch
> Little Cottonwo…
> Plumb Line Gully
 Access Issue:
 Gate Buttress Area Recreational Lease: Climbs on Church Buttress above vault remain closed
Details
Climbers Partner with LDS Church on Stewardship of Little Cottonwood Canyon Climbing
June 1st, 2017:The Salt Lake Climbers Alliance (SLCA), the Church of Jesus Christ of Latter-day Saints (LDS Church), and Access Fund announce the signing of an unprecedented lease for 140 acres in Little Cottonwood Canyon (LCC). The parcel, known as the Gate Buttress, is about one mile up LCC canyon and has been popular with generations of climbers because of its world-class granite.
The agreement secures legitimate access to approximately 588 routes and 138 boulder problems at the Gate Buttress for rock climbers, who will be active stewards of the property. The recreational lease is the result of several years of negotiations between LDS Church leaders and the local climbing community.
Access Note: The climbs on the Church Buttress above the vault as well as the Glen boulders that have been traditionally closed will remain closed.
Please help us steward this area and leave no trace.
Read More:
saltlakeclimbers.org/climbe…
Description
P1: Overhanging handcrack/flake to a slab with 3 very closely space bolts. Super Classic Mantle moves! Slab is somewhat mottled. Burly moves at the bottom, seems more physical and less technique than
Plumbline... (.9+)
P2: A lieback, finger to hand crack on a broken face. Difficult, sustained climbing up an arcing break. The crux comes early on past the second protruding tree, then a redpoint, technical/power crux comes up high at the mini-roof/undercling. Build a belay at a large pine tree if finishing, or build a belay with small gear and a slung chicken head at an overlap if continuing to the top. (.9++)
P3: Follow a small crack up the prow passing a bashie and a bolt. Build a belay and walk off. (.5)
Descend P1 by scrambling toward
The Thumb (West) and back down to the base of
Plumbline.
Descend P2 by scrambling west towards
The Thumb down some moderate, but secure terrain.
Descend P3 via a more difficult scramble west towards The Thumb
Location
Around the corner, up and right (east) from
Plumbline.
Protection
P1: Camalots #1-4, 3 quickdraws, one shoulder length sling w/ QD for the flake before the slab. NO BOLTED TOP ANCHOR. Can get a pink, blue, and red Lowe Tricam into detached blocks at base of the OW second pitch or sling a large block just after Hangman's finish.
P2: Standard rack of medium nuts and a full range of cams up to a #3 camalot. NO BOLTED TOP ANCHOR. Build a belay in a small over lap using micro cams.
P3: Standard light rack, and a few runners. NO BOLTED TOP ANCHOR.

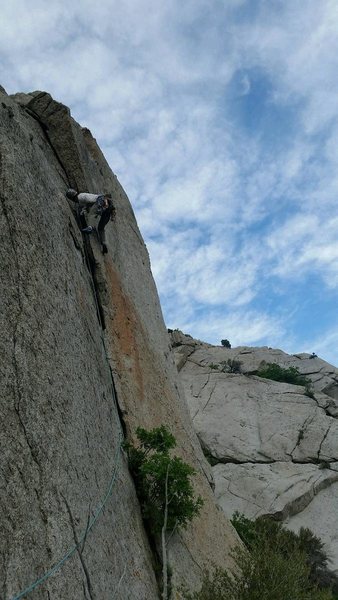
[Hide Photo] The second pitch beckoning
[Hide Photo] The start of the climb. This is right where Plumbline Gully forms the corner with Plumbline wall.


 Continue with onX Maps
 Sign in with Facebook


Small Lake, UT
There's a slung block on top of P1 with a quicklink to belay from, the cordelette is showing some discoloration. You can back it up by slinging 2 small bushes but it would be hard to get a solid piece anywhere near.
Don't miss P2, it's stouter than P1 but sports some very good climbing and wild moves. The horn feature will leave you puzzled...
The walk off the top of P2 is plush. Apr 12, 2010
SLC, UT
Salt Lake City
Sandy, UT
P2 Pro: Climb slab/chicken-heads, to enter crack above the second bush (to avoid wrestling with said bush). Even though the crack looks wide, it's narrow in the back and takes #0.5 - #2, we placed one of each. Nov 3, 2015
SLC, UT