Continue with onX Maps
 Sign in with Facebook


A couple woody construction questions


|
|
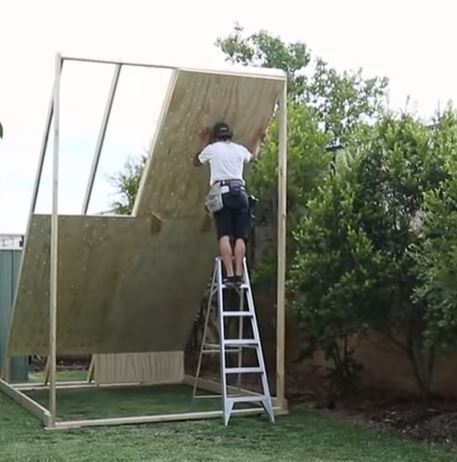
I'm biting the bullet and going to build a wall in the backyard soon. I'd love some input on a coupe questions I have just based on variations between what I've seen other people build. My plan is 12' x 12' freestanding at roughly 30 degrees.
Any and all thoughts welcome. |


|
Good questions, I used 8" on mine and don't find it terribly spaced. Especially on a 30 degree wall you can do lots of filling in with screw on holds, 40 and steeper 6x6 would probably be better. 16 vs. 24 OC I would follow the same pattern for framing houses: 16 OC you can use 2x4, 24 OC requires 2x6. Your horizontal strut space seems fine, I would change that up so they run where the sheets meet but that's just personal preference so I don't have to worry about blocking. It would help to mention your anchor type and indoor vs. outdoor. I also recommend angling out your verticals so you're less likely to swing into them and it creates a more stable platform for racking. |
|
|
2x6s are much stiffer than 2x4 - I wouldn't use the latter for structural framing, especially if you're considering making the spacing wider. Check out the woody building guide by Metolius - I followed their guidelines and ended up very satisfied. |
|
|
Bolting Karen wrote: Thanks for the advice! I will be building outdoors, pressure treated wood stainless t-nuts, etc. Planning on using some plastic sheeting on the back so the water runs off. Playing around with the idea of pouring a small concrete slab to anchor the base of the wall into as well. |
|
|
I F wrote: a footer would really help secure it if you are planning on going that route. No need to do a full slab. Depending on where you are located would determine your depth (frost heaving) or maybe necessitate a frost-free (insulated) footer. Piers would be cheaper and easier, especially if you live somewhere cold. Call before you dig! |
|
|
Bolting Karen wrote: Had to look both of those up (footers and piers), lol. Yeah I actually think piers would be the way to go. |
|
|
Best T nut spacing is 8” Diamond grid. It gives you 4” on diagionals. 6” causes problems with your framing layout. 8” is just not dense enough. You shouldn’t mistake a climbing wall for a framed house wall. Both take loads completely differently and it’s better to consider a climbing wall like you would a roof. 2x6 framing on 24” centers should be minimum for a 12’ wall. I have built a 12x12 with 2x8’s on 48” as well but that requires more specific framing connections. Horizontal blocking at plywood seams is sufficient. Pour 4 piers, two to support your kick panel beam (bottom of wall), two to support your top of wall beam. As mentioned it’s best for your upper posts to be 2’+ away from the sides of your wall. Put fiberglass roofing panels across the back of the wall. Plastic won’t last and it’s going to be hard to replace. |
|
|
Kevin Stricker wrote: Much appreciated, with you on the four piers concept. Can you explain what you mean when you say the upper posts should be two feet away from the sides? Most I have seen the upper posts are almost parallel with the sides of the wall. |
|
|
rock climbing wrote: Can you describe what you mean by this? I don't entirely understand what you mean by making flanges out of plywood. |
|
|
rock climbing wrote: Most likely trusses, a completely different and strong structure. |
|
|
If your upper support posts are only spaced as far apart as your wall they are a hazard for falling against. Worst case you rub one on the way down and get a splinter through an appendage. Fir has some really nasty splinters! Sounds improbable I know but I have a friend who had a splinter go through his pants and 2” into his leg(and almost exit!) just rubbing up against a bunk of lumber walking through Home Depot. You can splay the posts at a diagional to help prevent this, but it’s easier to just build them plum with spacing away from the wall. You can choose to use your upper support beam like a ledger and butt your wall joists into it but it’s probably easier to strap the joists up to the beam that’s run behind the wall. Ideally cantalever the last two feet of the wall past the beam. What Rock climbing is describing is stiching. You basically use short screws and screw plywood strips to your plywood panels through the back. I prefer to use 2x3’s because you can use them to straighten out your joists before you attach your plywood and it gives you something to clamp your panels to. Stiching panels is required on LED set-ups but takes more time. It’s also important not to compare a commercial wall which has a steel superstructure to a simple home climbing wall which is framed more similar to a standard roof. I think I still have some pics of one of my outdoor woodies on my profile if you want to check it out. Cheers. |
|
|
Kevin Stricker wrote: I am quickly realizing my carpentry/construction vocabulary and understanding are fairly limited. |
|
|
I F wrote: Doesn't help when every group (engineers, carpenters, electricians, climbing wall builders) all have their own names lol. Think of your top support piers being a little farther apart in width than your bottom support piers. Bottom supports should be at the edge of the wall, tops should be a little farther out. This will make you angle your support a bit to control racking (side to side movement) and you will be less likely to hit them with your body if you fall while climbing. My engineer friend always talks about triangles being strong, if you need strength add triangles. As for footer or pier depth, you can check your county's website to see if they have info on depth or size requirements for outdoor structures. Probably not required to follow them in this case but will give you a good idea of what is typical for your area. If you can't find anything there, call the cement yard, they'll know. Agree with fiberglass cover or if you can find some cheap roofing tin that works as well. 20 Common House Framing Terms You Should Know | The Family Handyman - This article has a good synopsis of a lot of the things getting thrown around here |
|
|
Bolting Karen wrote: Thanks! I'm good on the piers themselves and depth relative to frost line, that all checks out. Still trying to figure out if the wood-concrete post bases I can get from home cheapo are strong enough (planning on using 4x4s for the posts) or if I have to embed the posts in the concrete. If the top support posts are angled in, how are they connected to both to the piers and the wall? If they're vertical they're simple to anchor to the piers, but still left with the question of how you connect to the wall since there will be gap? I also just wanted to say thanks for the input from everyone, it's definitely highlighted some gaps in my planning I didn't even know were there. |
|
|
Here are a few pics of my home wall that might help. It's a freestanding 12 x 10 wall build with a truss design to add lots of storage space behind and side panels. My engineer would consider my double 2x6 beam undersized but I get minimal deflection at mid span. You would want to use 4x4 posts and a double 2x8 beam unless you built your wall at 8' width. Gusset plates would allow you to angle your posts. I think using ABU44Z post bases would be adequate, but burying 2' of post will make things more bomber ( at least for the next 10+ years!)   |
|
|
I F wrote: simpson makes metal bases that fix into concrete, either through bolts or set in rebar. The set-in rebar type can be put in at angles though its a bit messy to set up, easier if you cut back the slump in the top bit of concrete. Bolt ins would probably work better, just cutting the desired angle at the base of the post and bending the metal base to match. I always seal the post base with anchor seal, paint, something to minimize water intake and discourage termites in the open pores at the bottom but I'm used to doing this with decks where it gets covered up and can't really tell if its going bad. Either way its a nice professional touch. simpson also makes stongties with adjustable angles for all sorts of things, makes it nearly dummy proof for all your connections and way easier if you're building by yourself |
|
|
Don't embed the post in concrete. It's not necessary and will only make it a hassle to replace that post if it ever rots out. |
|
|
drew A wrote: Not saying I disagree with you Drew, but just using post bases adds a layer of complexity to the build that some people will struggle with. If you cantalever your wall past your upper beam and also extend your posts out past the edge of your wall you can have lateral racking at the post to beam connection that a buried post will help alleviate. Any diagional bracing between post and wall gets in the way of your climbing.
|
|
|
Great advice all around. My two cents would be do not put wooden holds on your outdoor woodie. Regardless if the wall is covered or not, temperature variations will cause the holds will crack in no time. Only use plastic or clay (think Synrock holds) outside. |
|
|
rock climbing wrote: That's impressive. Where do you live? Perhaps I should have mentioned how one climate may be more detrimental than another. For example, I live somewhere that has long, cold winters. Everyone I know that lives here and has put wood holds on their outdoor woodie has been left with cracked holds. |
|
|
I'm starting to gather some supplies, order holds, and finalize design, thanks for everyone's input. Final questions are how wide of a pier do I need for a 4x4 post, and is the below post base appropriate? https://www.homedepot.com/p/Simpson-Strong-Tie-PB-ZMAX-Galvanized-Non-Standoff-Post-Base-for-4x4-Nominal-Lumber-PB44Z/100375031 |