Continue with onX Maps
 Sign in with Facebook


Building a garage climbing wall - questions

|
I'm looking at building a climbing wall in my garage, but have zero carpentry experience. The board would be 8' x 12' and fixed at a 40 degree overhanging angle (exactly like a Moon board or Tension board). A few questions: 1. Are the ceiling joists in my garage strong enough to support the climbing wall? I was thinking about attaching sleepers across three of the joists and then attaching the climbing wall studs to the sleepers and the wall studs, like in the Metolius plans. But the ceiling joists in my garage aren't supporting a room above them, just the roof, as you can see in the pictures. 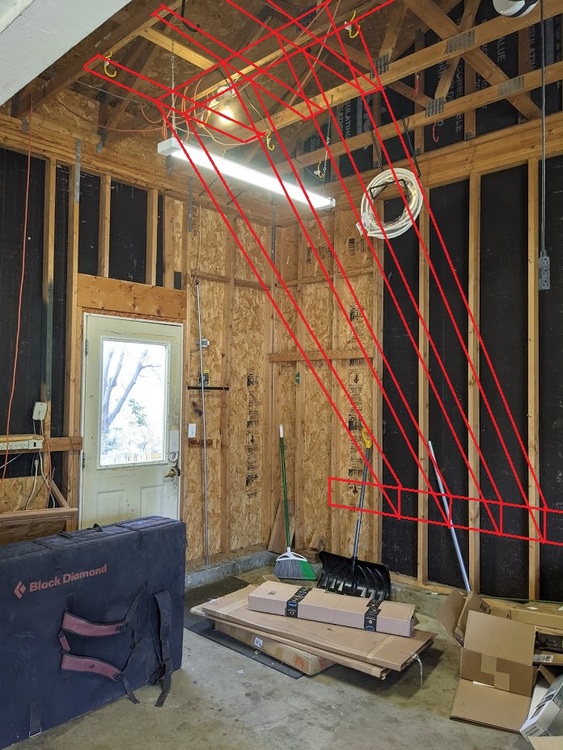  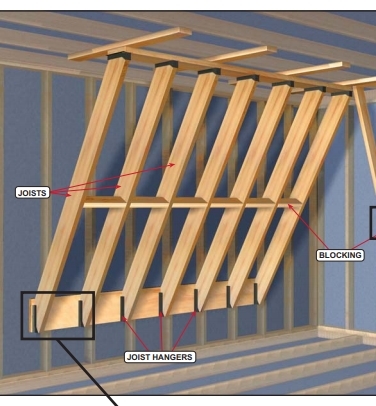 2. For a freestanding wall, is it better for the support structure to be an A-frame with angled support posts, or vertical support posts? 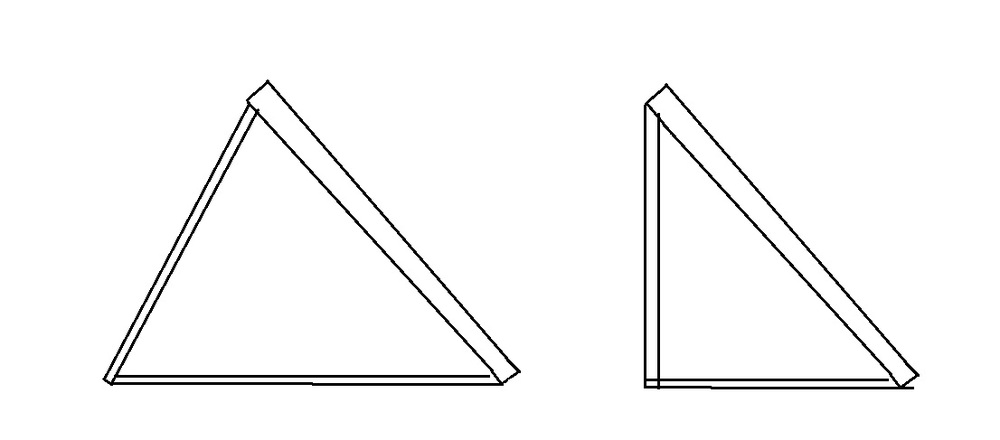 3. Many freestanding walls have a design where the support posts are adjacent to the wall frame. Is this adequate, or would it be stronger if the support posts were directly under the wall frame? 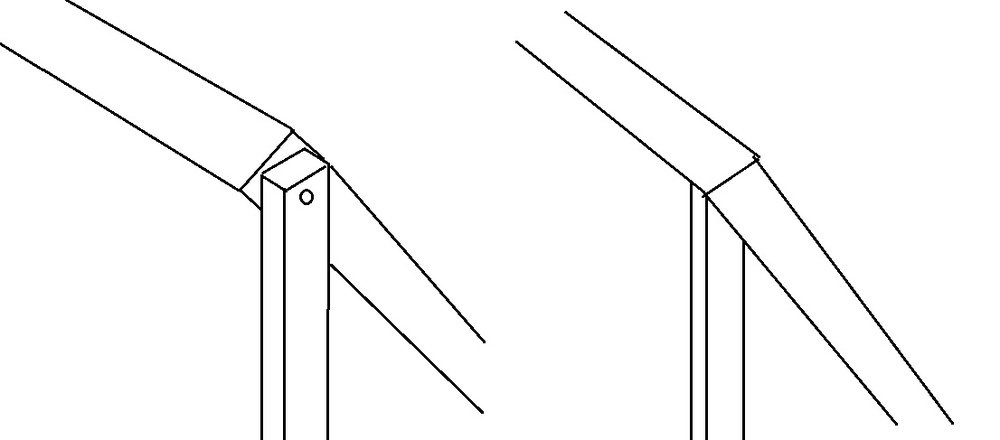 Alternately, can anyone recommend a carpenter in the Denver area that can build me the framing at a fair price? Thanks for reading through and appreciate any advice. |

|
I can only answer the question about the free standing. Mine was (just tore it down to build a permanent wall) not A-frame, the support was vertical. And supports were adjacent using lag bolts. It was really solid. 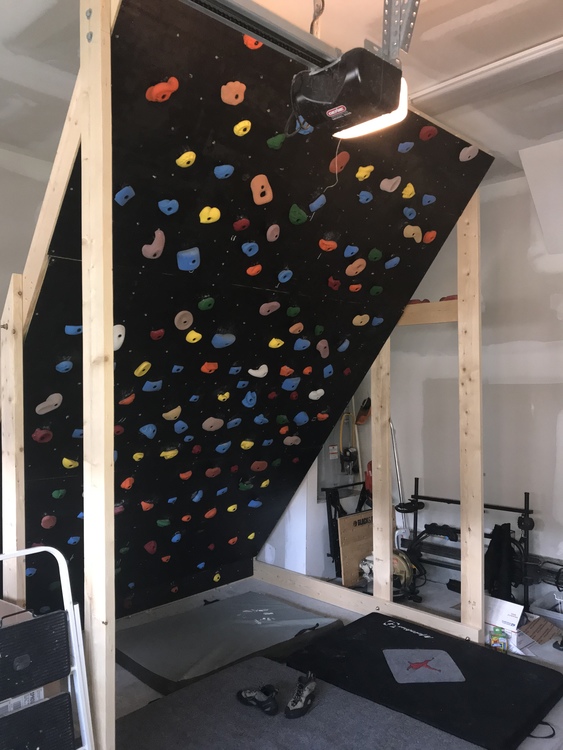 |
|
|
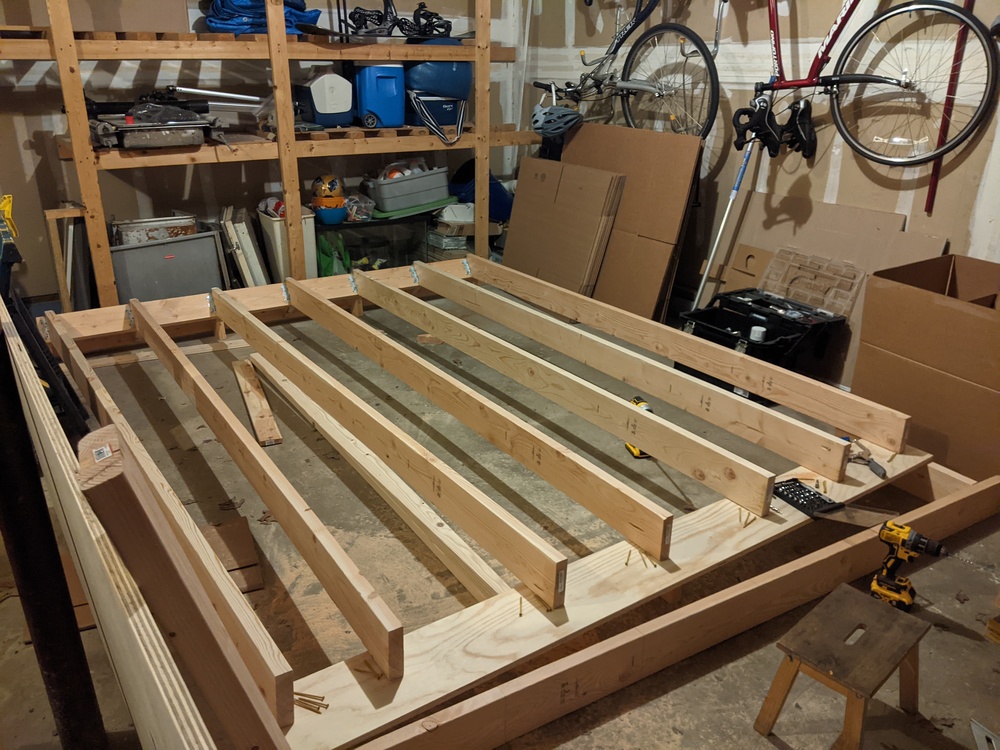
Thanks guys, this is helpful. Here is my design so far: 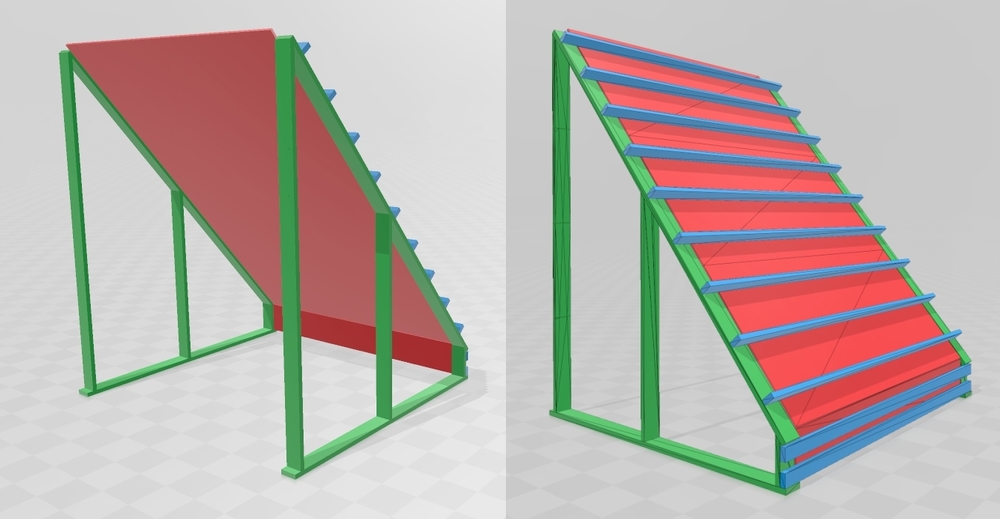
|
|
|
https://www.metoliusclimbing.com/pdf/How-to-Build-a-Home-Climbing-Wall.pdf here's the link for the Metolius plans you mentions super helpful, yet concise |
|
|
Prav C wrote: Look at my picture above. This is essentially what I had built, except my supports were turned 90 degrees compared to those in your diagram. Not sure if that really makes any difference. I had also made a box frame for my kicker, so perhaps that was providing more support than just the legs, so maybe consider doing that. 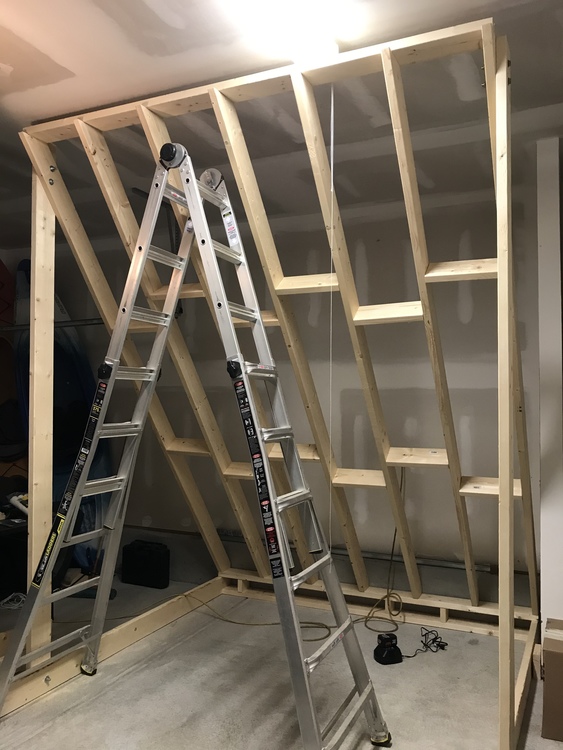 |
|
|
I recently finished my 8'x12' 40° wall and it is supported by the 2x4's making up the bottom chord of the roof trusses (edited for accuracy) similar to yours. I added significant reinforcement to the joists and the final result is rock solid. It sounds like you may already be going with the freestanding option but if not I am happy to provide you more info on my setup. |
|
|
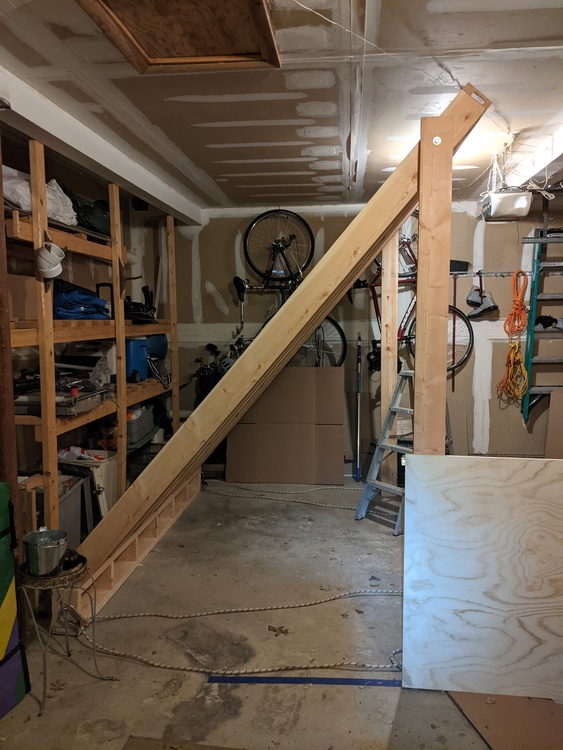
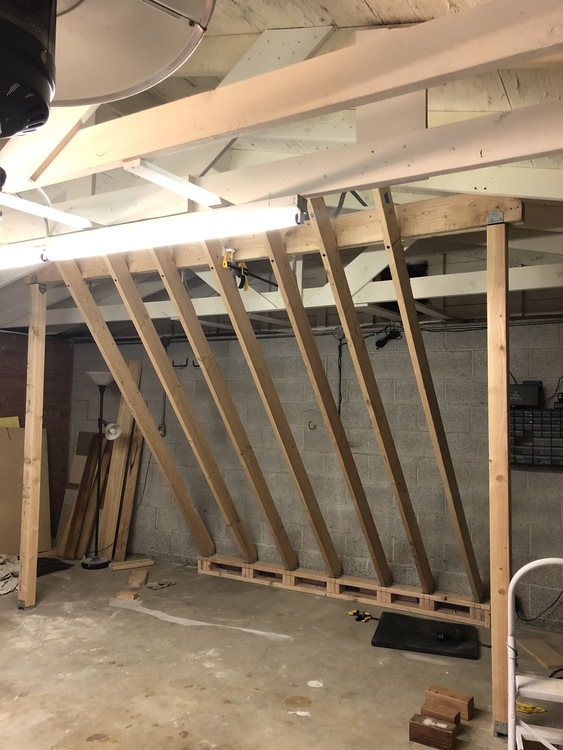 We had to build a more-or-less free-standing wall because the rafters in our garage are not load-bearing or even up to code. We built a header of screwed together 2x8s resting on 4x4 posts and bolted them to the floor. The joists connect from the header to a box, which is also bolted to the floor. I'd be happy to share more details if anyone is interested. Here is the final product: 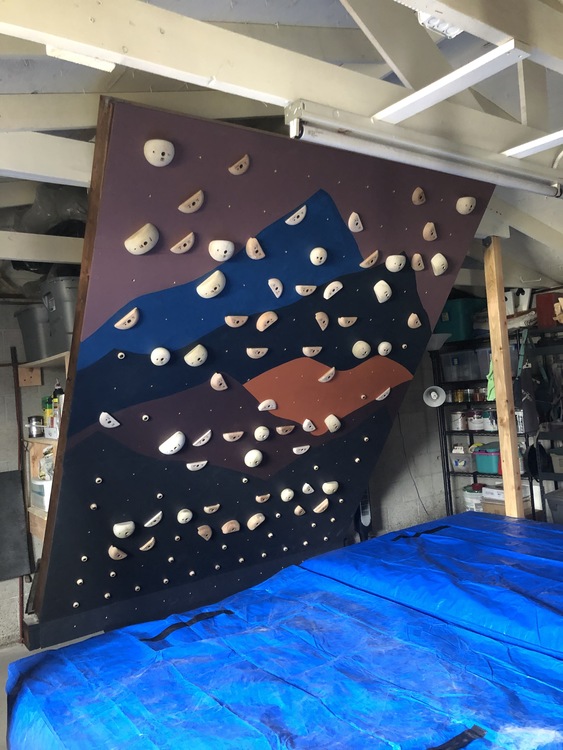 |
|
|
I built a freestanding 8'x10' 40° wall over the holidays and assembled it alone (with 1 helper at one point, who didn't need to do any heavy lifting, but you could probably do without them). I took some inspiration from csproul's design actually. It's very stable. Here it is from the front in real life, and back in Sketchup. 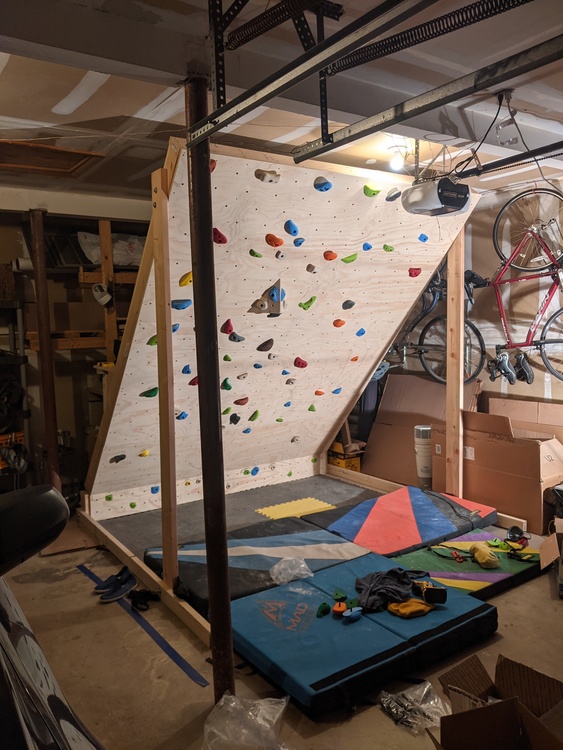 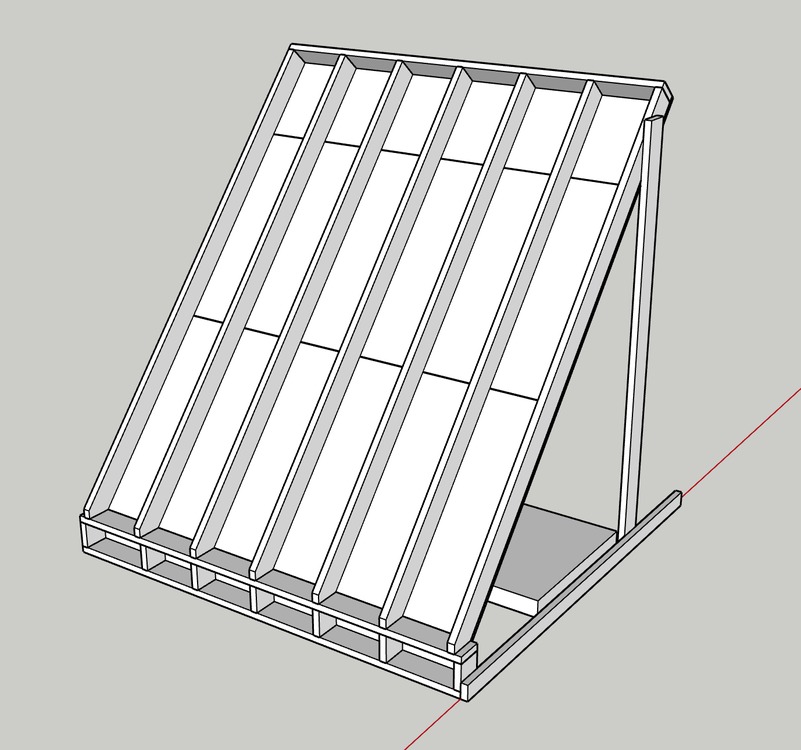 All wood is 2x6s except for the bottom rails connecting the supports to the kicker, which are 2x4. All joints in the supports are attached with 1/2" diameter bolts, with 2 in each top joint (so 8 bolts total). The vertical joists are secured to the kicker with joist hangers. I got the plywood ripped down to 2x8 sheets at the hardware store so I could fit them in the car, but that also made it possible to install them on my own pretty easily by making cleats out of scrap from the 2x6s. The assembly order is:
I think your design will be harder to assemble as one person than you are expecting. |
|
|
Thanks so much for all the info, Matt those instructions will be very helpful. I decided to go the professional route with an MP user who is a contractor and has experience building climbing walls. If anyone else is interested I can put you in touch. |
|
|
what kind of paint do ya'll use for making it look all pretty and nice? Basic interior oil paint? |
|
|
Dan Bookless wrote: We used the tintable chalkboard paint from Lowes because we bought a tension board but not the LED light system. With the chalkboard paint, we can tick routes in sidewalk chalk and easily erase them when we are done. |
|
|
Creed Archibald wrote: I used chalkboard paint as well. |
|
|
Dan Bookless wrote: I used a coat of primer, then an interior/exterior semi gloss enamel (I think that means it's oil based) paint from Behr. Only had the wall a month but it's held up well to being kicked so far with no chips or peeling. You should try to let the paint dry for a really long time (2+weeks) before bolting on your holds, otherwise your holds will stick to it and may peel off the paint if you move them. |
|
|
Following up, I want to give a shout out to fellow MP user Kevin Stricker, who built my wall. Kevin is a local climber and contractor who has been building climbing walls for 20+ years. During the planning process he helped me think through angles, kickboard height, etc. He bought all the materials, drilled the panels to Kilter board spec, constructed the framing, and mounted the panels. He was super attentive to detail, making sure the wall had clearance over the doorway, making room for the LEDs behind the kickboard, etc. Given my concerns about my garage roof joists, he beefed up the framing with additional bracing into the wall studs. https://www.mountainproject.com/user/11054/kevin-stricker 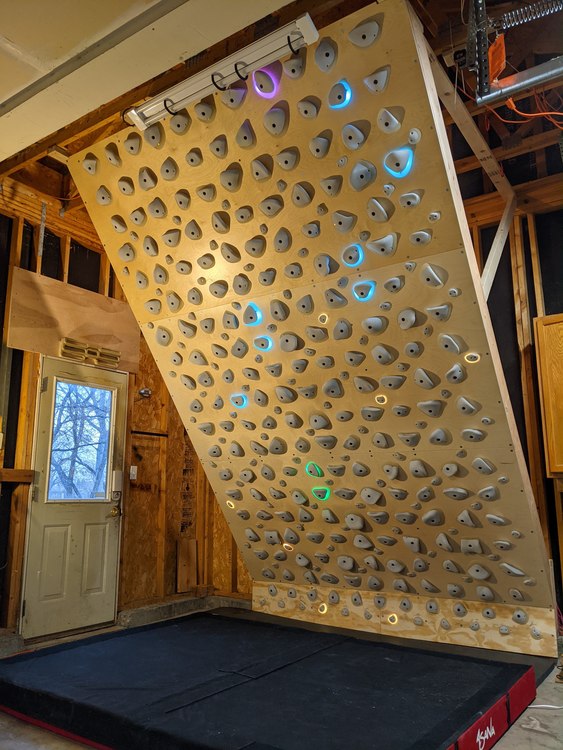 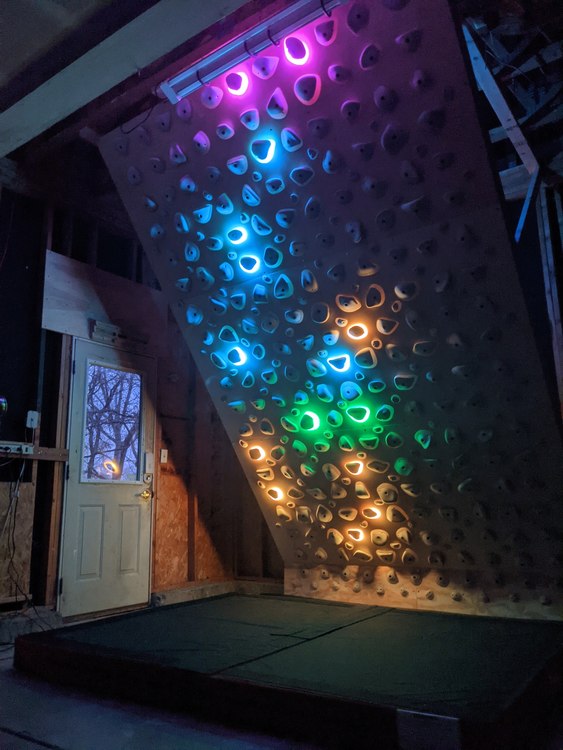 |
|
|
did you finish it? |