
 Continue with onX Maps
 Sign in with Facebook


Replacing split shaft climbing bolts with Powers Bolts at Sugar Loaf
|
|
Bobby Hutton and I show the process of removing split shaft climbing bolts for an anchor at Sugar Loaf in Tahoe California and replacing it with 1/2" SS Powers bolts donated by ASCA ( safeclimbing.org/).
Any tips or tools we could have used to do it better... let us know! Thanks |


|
Hey Ryan & Bobby, |
|
|
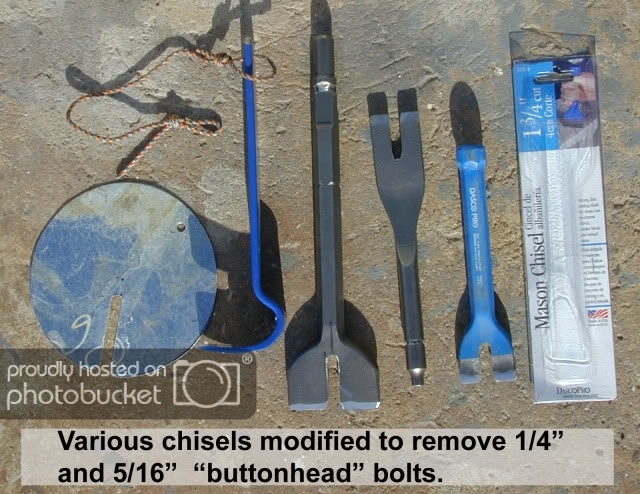
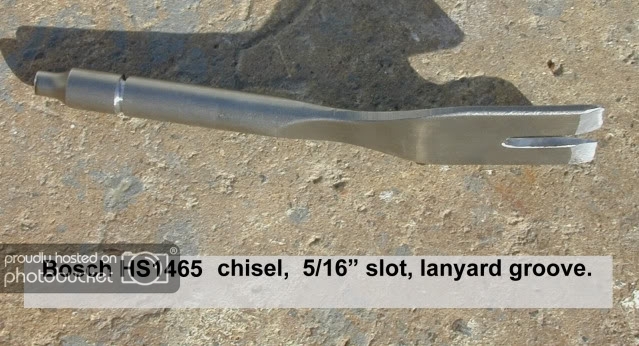
Nice video. These 5/16" Rawl "Drives" (aka: "split shaft", "buttonheads") are a PITA to remove compared to 1/4". |
|
|
   |
|
|
Agreed on using a torque wrench. Especially if using SS 3/8 in 5 piece bolts. Torque spec is only 12ft-lbs You can see him throw out the little paper/plastic/whatever washer that is supposed to tear when you reach the correct torque, but while using a torque wrench I rarely get these to tear, so I don't know how accurate they are. |
|
|
Has anyone every tried modifying an SDS chisel bit with a slot? waste of battery? effective? |
|
|
Taylor, |
|
|
Baja, |
|
|
Taylor, |
|
|
Benjamin Chapman wrote: Hey Ryan & Bobby, Next time I'll be clipped in too :). We used a bag for the bolts down the face we changed out after this video, it is super helpful. I heard fanny packs work too? |
|
|
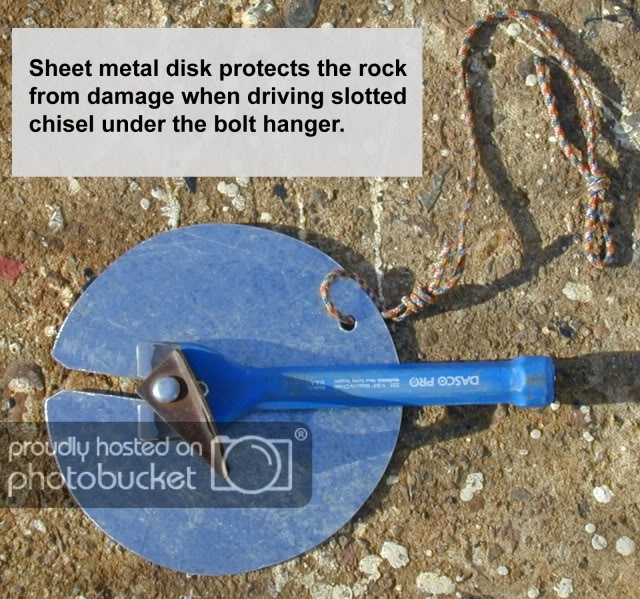
ClimbBaja wrote: Nice video. These 5/16" Rawl "Drives" (aka: "split shaft", "buttonheads") are a PITA to remove compared to 1/4". Those are some nice chisels. Having lanyards on everything would make things pretty handy. I have used the sheetmetal in the past to protect the rock, it didn't seem to damage where we were much maybe because the type of rock. So most know the wave bolt can't be hit with a steel hammer (either the adapter sold or a plastic hammer or some barrier), but I've never heard about it for other ss bolts and I had this conversation the other day about that. So we were wondering why the few micro flakes on the surface of ss mattered, even if it rusted those flakes... and we use aluminum and steel carabiners and sometimes put 4kn + shockload on them, doesn't that transfer steel onto the stainless? I know the rule, but I like to question everything. What is your take on that rabbit hole? |
|
|
ClimbBaja wrote: Taylor, Would that risk breaking the bolt? I haven't tried it but I'm thinking it might be too aggressive? |
|
|
Ryan Jenks wrote: Thanks. Over the years I've experimented making a number of larger "tuning forks" for removing 5/16" buttonheads. My 1980s - early 1990's era bolts are in need of replacement in Baja California. One tool I fabricated was designed to pull from the eye of the hanger. It worked well for 1/4" bolts. When used on 5/16" buttonheads it had a tendency to rip the hanger over the head of the bolt. For a small bolt, those Rawl Drives can be tough! Another tip on making tuning forks: grind some material near the ends of the prongs to create a more acute angle. By making the tool thinner, it helps in the initial stage of getting the fork under the hanger and for the bolt to start moving out of the hole. Maybe do a search on this forum or Supertopo for more info on stainless steel contamination. One such thread has a good explanation from Ken Noyce, scroll down to his post on 7-24-2017. https://www.mountainproject.com/forum/topic/113359454/fixed-hardware-etiquette-and-a-question-re-glue-in-bolts?page=2#ForumMessage-113382506 Other sources of information for industry and metal fabricating have cautions about keeping stainless free of iron contamination, including avoiding splatter from nearby welding and grinding on carbon steel, and blows from a steel hammer. https://www.bssa.org.uk/topics.php?article=55 |
|
|
Ryan Jenks wrote: If the slot is adjusted correctly around the bolt, the chisel should be wedging the hanger and bolt outward, and not applying a shearing force to the bolt. I don't see why it would be significantly more likely to break the bolt. The idea is to have less fatigue to your arm and wrist. Instead of 50 wild swings with a light climbing hammer, perhaps 15 concentrated blows with a heavier hammer. The right hammer for the job. A tack hammer is not very useful for framing a house. Bobby's hammer looks particularly light for a climbing hammer. The heavier and more typical Chouinard/BD Yosemite hammer is still too light for the job. A tuning fork made from a 1" cold chisel almost negates the need to stack smaller tuning forks. AFAIK, all of the 5/16" Rawl Drives were 1.5" in length.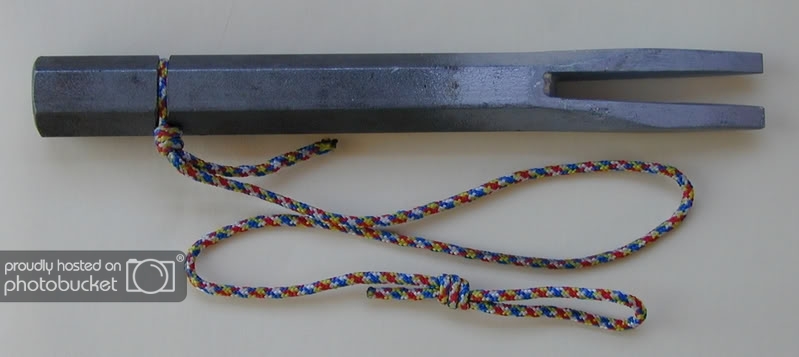 |
|
|
Ryan, you might find these interesting: 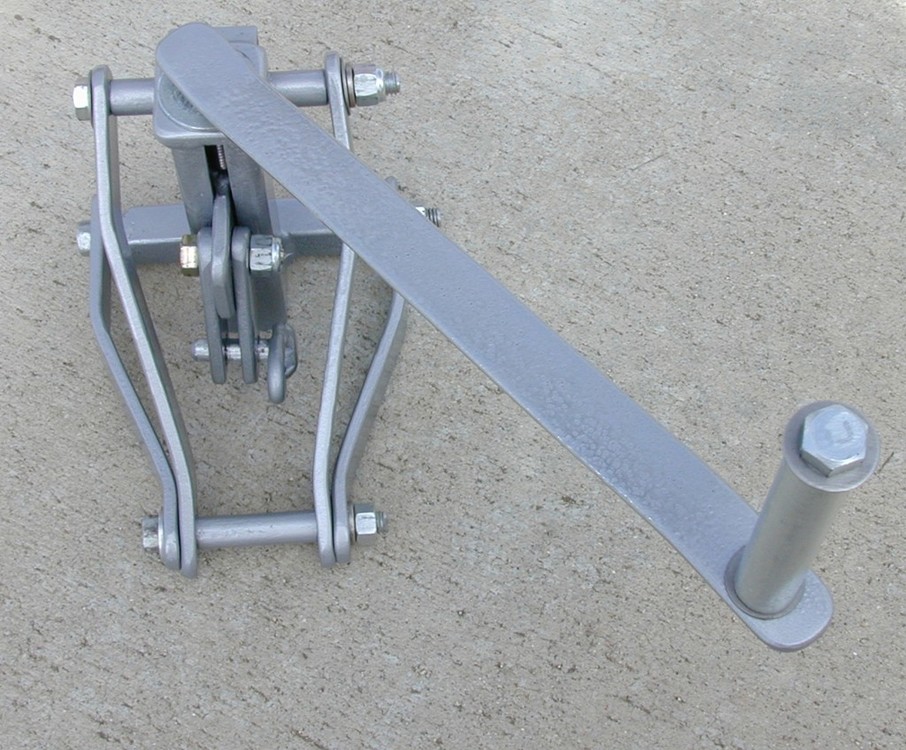 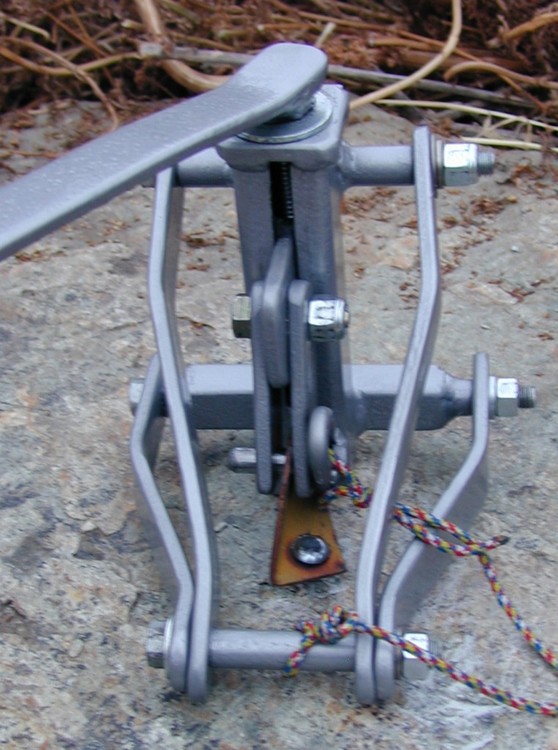 5/16" Rawl "Drive" buttonhead, Spanish "Lucky" hanger. 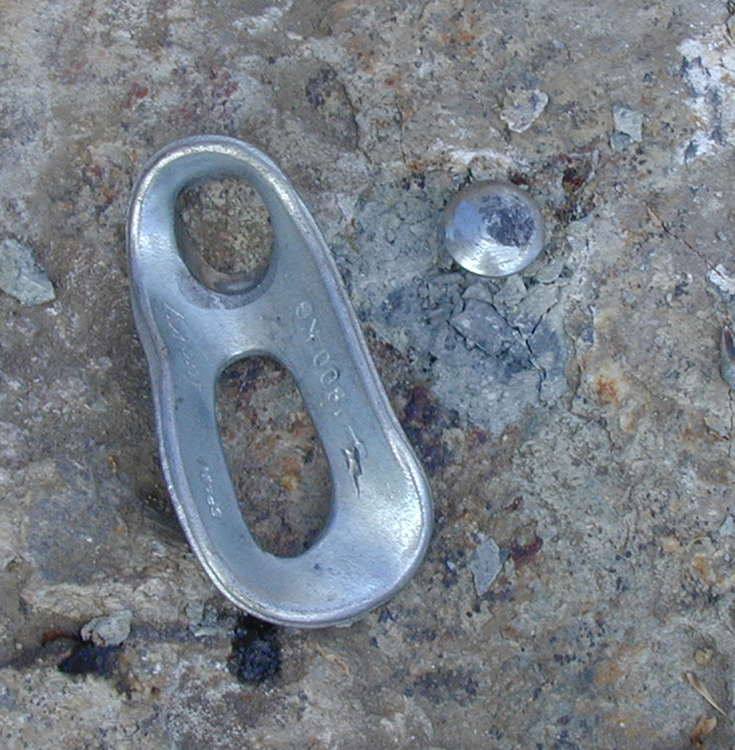 5/16" Rawl "Drive" buttonhead, Raumer SS hanger. Pulled out with a 12,000 lb. Warn winch, just for grins. 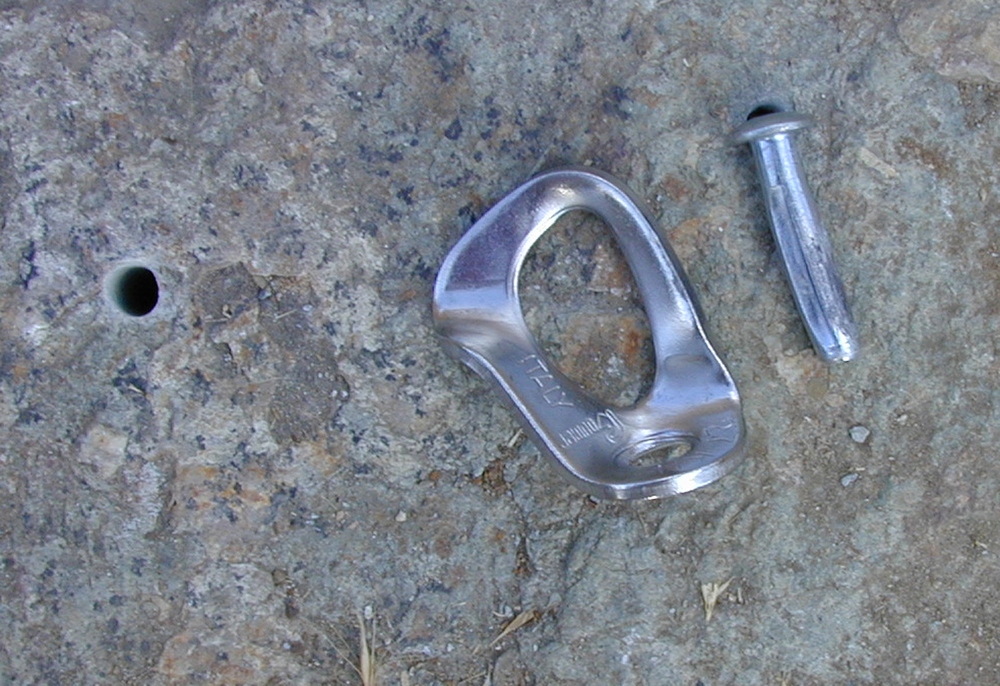 Another prototype. It worked but had no advantages over the 1" chisel "tuning fork". This "slide hammer" was heavy and cumbersome. A worthwhile experiment, but I can't imagine trying to use it while on rappel. It still required hammering to get the fork underneath the hanger, before commencing with the slide hammer action. The fork was cut off from the end of a Vaughan "Superbar" and welded to the pipe. 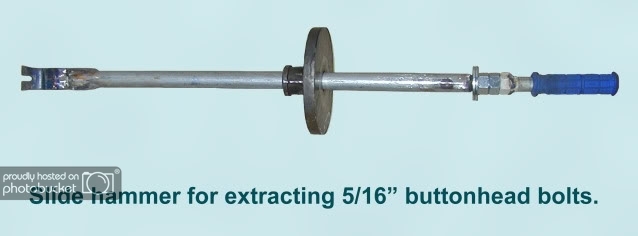 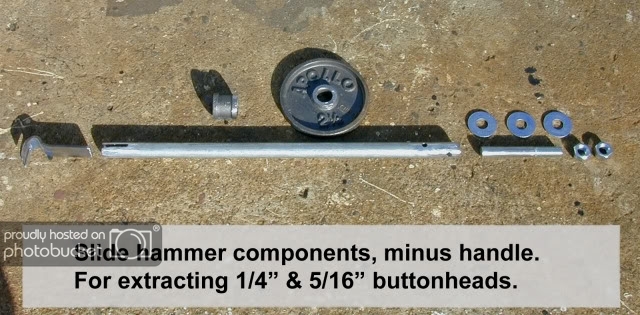 |
|
|
As has been mentioned elsewhere drilling a small diameter hole right next to the Rawl drive bolt will make it much easier to extract. |
|
|
Timothy Fisher wrote: As has been mentioned elsewhere drilling a small diameter hole right next to the Rawl drive bolt will make it much easier to extract. |
|
|
How do you drill parallel and adjacent to the bolt with a hanger in the way? |
|
|
ClimbBaja wrote: How do you drill parallel and adjacent to the bolt with a hanger in the way? Drill as close as you are able. Should be able to get the hanger to "spin". Since the 5/16 Rawl drive are so short the hole for a 1/2 x 2 3/4 should not be compromised. But a short glue in would be guaranteed no problem. I like having a 70mm bolt products twist bolt with me when replacing bolts in hard rock. |
|
|
All awesome feedback. It's going in my journal to update in the next edit. Thanks! |


