Mountain Project Logo

Q regarding replacement of very corroded “5 piece” sleeve bolts

Original Post
Mitchell Goldman · · Moran, WY · Joined Oct 2015 · Points: 168

Preface:  I have some experience and am comfortable replacing and installing wedge bolts and have all the tools and skills to do so.  However I have no experience with 5 piece sleeve bolts.  

I would like to replace the bolts on a route that was stance bolted with 3/8” sleeve bolts sometime between 1982-88.  As far as I can tell the bolts are original to the FA, are plated steel with stainless SMC hangers, and were caulked with some sort of silicone.   They are intensely corroded.  The rock is high quality granite.  The route is very good and worth climbing, but of the steep, runout slab variety.  A fall resulting in bolt failure would be very bad.  

I’ve read all of the material I can find on replacement of this type of hardware and it should be no problem for me as long as everything goes relatively according to plan.  My question is what are my best options if/when a bolt snaps off in the sleeve when trying to remove it? 

The approach is about 3 miles each way, and is designated backcountry.  I would prefer to stay compliant and use only hand tools. Just for sake of conversation I do have access to cordless impact drivers and bosch hammer drill.  

Thanks in advance for any advice 

Ken Noyce · · Layton, UT · Joined Aug 2010 · Points: 2,658
Mitchell Goldman wrote:  

...My question is what are my best options if/when a bolt snaps off in the sleeve when trying to remove it? 

Patch the hole and drill a new one.

Peter Thomas · · Denver, CO · Joined Jul 2018 · Points: 269

Ken's probably got the best idea. You may be able to use a punch driver to pound the bolt back in the hole, disengaging the cone to get the sleeve out, but it will then be hard to get the cone/stud out. If I break a 3/8 sleeve anchor, or strip the head, I do what Ken does. 

Brian in SLC · · Sandy, UT · Joined Oct 2003 · Points: 22,464

You might try the above...punch the busted part as far into the hole as it goes...maybe someone intially over drilled the hole depth, but, if it was stance drilled sans power, probably not.

Maybe try an old, worn out drill bit and see if you can just drill it out?  I've had luck drilling out cones left in the bottom of holes.

Might be able to core out the hole to a larger diameter too.

timothy fisher · · CHARLOTTE · Joined Nov 2017 · Points: 30

I have replaced dozens of 1/2 inch 5 piece bolts that were badly corroded. I have only had one break in the hole and I suspect it was over tightened. It took a good bit of force to break the bolt! Also it broke at the head which I found surprising.
Hopefully those will all come out. Since it is so remote you probably should be prepared to drill though.

Brian in SLC · · Sandy, UT · Joined Oct 2003 · Points: 22,464

Re-read the OP...

Yeah, patch and re-drill.  Try to make sure the new hole is a good 4 inches+ away from the original hole (to avoid the "cone of weakness").

mattm · · TX · Joined Jun 2006 · Points: 1,885
Brian in SLC wrote: Re-read the OP...

Yeah, patch and re-drill.  Try to make sure the new hole is a good 4 inches+ away from the original hole (to avoid the "cone of weakness").

Or use a glue in right on top of the old bolt and you'll both patch the old hole and keep the bolt nearly in the original spot.  Jim T posted in another thread testing this with a HOLE beneath and the results were great.  This is will be my SOP going forward with botched removals.

Taylor Krosbakken · · Duluth, MN · Joined Nov 2008 · Points: 1,086
mattm wrote:

Or use a glue in right on top of the old bolt and you'll both patch the old hole and keep the bolt nearly in the original spot.  Jim T posted in another thread testing this with a HOLE beneath and the results were great.  This is will be my SOP going forward with botched removals.

Here is the thread you are referring to: https://www.mountainproject.com/forum/topic/116970396/drilling-directly-above-sheared-off-bolts-or-stuck-sleeves-for-glue-ins 

Really only applicable to replacing with glue-ins, so depends if the OP is using glue-ins or not. 

Jim Titt · · Germany · Joined Nov 2009 · Points: 490
Taylor Krosbakken wrote:

Here is the thread you are referring to: https://www.mountainproject.com/forum/topic/116970396/drilling-directly-above-sheared-off-bolts-or-stuck-sleeves-for-glue-ins 

Really only applicable to replacing with glue-ins, so depends if the OP is using glue-ins or not. 

That thread was specifically about glue-ins, how do you know whether it is applicable or not to mechanical bolts?

jonathan knight · · Unknown Hometown · Joined May 2006 · Points: 265

If the 5 piece shears, it typically breaks at the head flush with the rock surface and is near impossible to countersink. Even tried a hand sledge on a couple. You can drill down into the metal with a sacrificial bit to create a patchable void, but that tends to mushroom the metal and crater around the placement.

Too avoid snapping the bolt, a friend suggested a more patient approach: In an optimal position, loosen the bolt in small increments interspersed with tightening to relieve tension before it shears. This can take a while. I use a 1/2 inch drive ratchet and a 6-point socket with the face-taper sanded away to maximize contact and minimize the chance of stripping the hex head. Generally, this has helped in the process.

Brian in SLC · · Sandy, UT · Joined Oct 2003 · Points: 22,464
mattm wrote:

Or use a glue in right on top of the old bolt and you'll both patch the old hole and keep the bolt nearly in the original spot.  Jim T posted in another thread testing this with a HOLE beneath and the results were great.  This is will be my SOP going forward with botched removals.

Remember though, in this case, the OP isn't using a power drill and he'll be a ways back in the wilderness.  

JK, any luck with using a penetrating solvent for stubborn 5-pieces?  Seems like if time wasn't an issue, soaking the placement for a few days might make the bolt easier to remove and lesson the chance of breaking it.
Taylor Krosbakken · · Duluth, MN · Joined Nov 2008 · Points: 1,086
Jim Titt wrote:

That thread was specifically about glue-ins, how do you know whether it is applicable or not to mechanical bolts?

I guess I misspoke a bit. I meant that the linked thread was referring to glue-ins and I have only seen testing (from you) with glue-ins.

I made the conservative assumption that it wouldn't be the case with mechanical bolts. PROVE ME WRONG!!!

Mitchell Goldman · · Moran, WY · Joined Oct 2015 · Points: 168

Thanks everyone for the great info.  Keep it coming.

I have considered using glue ins for this and recognize that they are probably the best way forward for rebolting in most circumstances.  Unfortunately in this case, if I end up drilling new holes, it will most likely be by hand.  New 1/2”x4” holes for 10x100mm SLBs I estimate will take me an additional two hours of drilling compared to new 3/8”x2.75” wedge bolts. I’m a full time farrier/blacksmith so I basically swing a hammer all day and am not scared of the extra work,  but it seems a bit silly to add the complexity and effort for an obscure backcountry route which will sadly never see much traffic.  I’d just like to update the route safely and in the way that is most respectful to the resource.  Ideally reusing the same holes and replacing with 1/2” power-bolts.  You’ve all shared a lot of great tips so far and I guess I just need to go up there, be patient, hope for the best and see what happens.

C Williams · · Sketchy, Blackvanistan · Joined Jul 2013 · Points: 1,795

With stubborn 5-piece bolts I've had really good luck squirting a bit of water in the hole and then gradually tightening an loosening the bolt as Jonathan suggested. If you are lucky, the whole unit can spin and all of the parts come out at once.

As for the cone of failure, that really only applies to simultaneously loaded anchors in concrete. Since the old hole is no longer under load and not large enough to be factored as an edge, the new bolt can be placed as close as an inch or two away in hard rock like granite.

Brian in SLC · · Sandy, UT · Joined Oct 2003 · Points: 22,464
C. Williams wrote: As for the cone of failure, that really only applies to simultaneously loaded anchors in concrete. Since the old hole is no longer under load and not large enough to be factored as an edge, the new bolt can be placed as close as an inch or two away in hard rock like granite.

Seems like granite can range from pretty darn hard, to, fairly soft.  Based on the drill bits I've worn out of the years...always seems  like granite is less hard on my bits than some harder limestones and especially quartzite.

I think if possible, a hand span's distance away is prudent unless there's a compelling reason not to.

Would depend on the rock configuration too...

Bolt placement failure below...kinda interesting...spalled out nearly in a cone...(2 1/4" long powerbolt).

Greg Barnes · · Unknown Hometown · Joined Apr 2006 · Points: 2,197

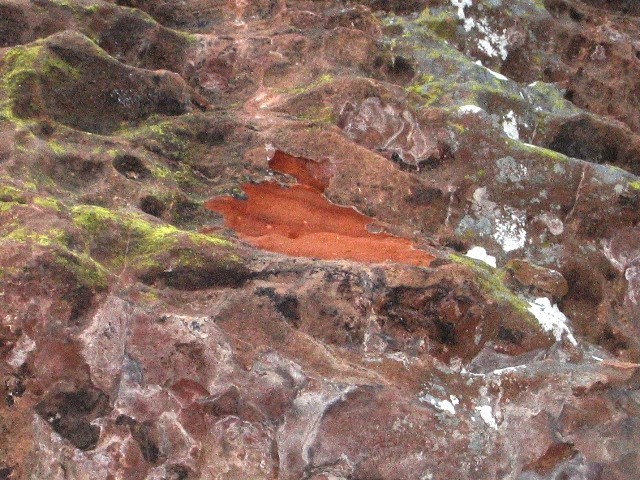
In my experience, if they appear intensely corroded on the bolt heads, the bolts will almost certainly snap off during removal no matter how careful you are. Plan on drilling a new hole next to each bolt - and if you manage to remove any, you'll be pleasantly surprised.

Instead of stainless wedge bolts, please consider using 3/8 x 2.25" stainless 5-pieces (Power-Bolts), which are both stronger and much easier to replace in case future replacement is needed (since spinning a wedge bolt is very difficult without power tools).

Also consider the possibility that the bolts are actually 1/4" Taper Bolts, which are sometimes confused with 3/8" 5-pieces at a glance (both have hex heads, the 1/4" taper bolt heads are thinner and need a 7/16" wrench not a 1/2" wrench). This is far more likely if the bolts were placed in the early-mid '80s, and less likely from 1987 on (power drill era). If they are Taper bolts, you can remove them with thin pins and a tuning fork. Do you have any close-up photos of the bolts?

Mitchell Goldman · · Moran, WY · Joined Oct 2015 · Points: 168

Thanks Greg.  I will order a few 3/8”x 2.25” Power-Bolts.  I don’t have enough wedge bolts on hand to do the job anyway and would rather do it right.  I will say I’ve had good luck removing wedge bolts here without power using Dan Merrick’s spinner tool.  It is time consuming but doable.  

I haven’t considered that they could be 1/4” Taper Bolts but that is an interesting point.  The hardware seemed to have more mass than I would expect from a taper bolt but I wasn’t really thinking about it when looking at them.  I don’t have any photos of the bolts but I’m up there once a week or so and will drop in on it again to look more closely and snap a couple photos.  Can you share any photos or specs on the tuning fork and pins you use to pull those bolts?  I can easily forge some or modify some knifeblades and lost arrows from my winter rack if I know how big to make the throat in the tuning fork to go around the bolt.  

Gunkiemike · · Unknown Hometown · Joined Jul 2009 · Points: 3,687
Mitchell Goldman wrote: Thanks Greg.  I will order a few 3/8”x 2.25” Power-Bolts.  I don’t have enough wedge bolts on hand to do the job anyway and would rather do it right.  I will say I’ve had good luck removing wedge bolts here without power using Dan Merrick’s spinner tool.  It is time consuming but doable.  

I haven’t considered that they could be 1/4” Taper Bolts but that is an interesting point.  The hardware seemed to have more mass than I would expect from a taper bolt but I wasn’t really thinking about it when looking at them.  I don’t have any photos of the bolts but I’m up there once a week or so and will drop in on it again to look more closely and snap a couple photos.  Can you share any photos or specs on the tuning fork and pins you use to pull those bolts?  I can easily forge some or modify some knifeblades and lost arrows from my winter rack if I know how big to make the throat in the tuning fork to go around the bolt.  

But aren't the current 3/8 PB's just a 5/16 bolt inside the sleeve? I've read that they are NOT equivalent to the PBs of a few years ago.

Taylor Krosbakken · · Duluth, MN · Joined Nov 2008 · Points: 1,086
Gunkiemike wrote:

But aren't the current 3/8 PB's just a 5/16 bolt inside the sleeve? I've read that they are NOT equivalent to the PBs of a few years ago.

I believe that's the non-SS Power-Bolt+ (plus). On Climbtech's website you can buy 1/2" plated Power-Bolt+ (plus) but not in 3/8 in likely because they are not strong enough. 

Looking at the specs, the 3/8 PB+ is 17.7 kN and the 1/2" PB+ is 35.7 kN

jonathan knight · · Unknown Hometown · Joined May 2006 · Points: 265

Hi Brian, I haven't tried any solvents as it's not the end of the world to drill a new hole when the task is ideally a one day turn around involving multiple placements. Also don't want to leave any residue that may interact with glue or even a new mechanical bolt. I know that may not be an issue or a washing out could do. Some experimentation or better info is needed. Seems that it would be tough to tell whether penetration is adequate. Do you think that stuff would crawl up to the cone in an overhanging placement?

Certainly a bummer when they snap. Seized Rawls from the Eighties are becoming more of an issue out West in the harder substrates. Best of luck with the work Mitchell.

Greg Barnes · · Unknown Hometown · Joined Apr 2006 · Points: 2,197
Mitchell Goldman wrote: The hardware seemed to have more mass than I would expect from a taper bolt but I wasn’t really thinking about it when looking at them.  I don’t have any photos of the bolts but I’m up there once a week or so and will drop in on it again to look more closely and snap a couple photos.  Can you share any photos or specs on the tuning fork and pins you use to pull those bolts?  I can easily forge some or modify some knifeblades and lost arrows from my winter rack if I know how big to make the throat in the tuning fork to go around the bolt.  

They are probably 3/8" 5-pieces, your original date range just made me think of 1/4" Taper bolts since basically no one used 5-pieces before power drills in '87. 

The 1/4" tuning forks are just a 1/4" slot milled down the middle of a #3LA, and it's nice to ramp the end of the pin. You still need thinner pins to start popping the 1/4" bolts out (don't drive the thin pins straight into the bolt or you might chop it). Tuning forks are useless on 3/8" bolts though (except 3/8" Star-Dryvins where you can use them above the hanger to pull the 1/4" nail).
Guideline #1: Don't be a jerk.

Fixed Hardware: Bolts & Anchors
Post a Reply to "Q regarding replacement of very corroded “5 pie…"

Log In to Reply
Welcome

Join the Community! It's FREE

Already have an account? Login to close this notice.