Continue with onX Maps
 Sign in with Facebook


Woody for Crack Climbing


|
|
Does anyone have a woody that for crack climbing? |
|
|
take 2 3 foot 2X8's and bolt them together with 4 unscrewable bolts so you can adjust them. do a ton of pullups and go to indian creek. |
|
|
Yeah living in chicago sucks for climbing.. At least there is climbing gyms. Then Long Road trips. |
|
|
|
|
|
Radical. Post the list please. |
|
|
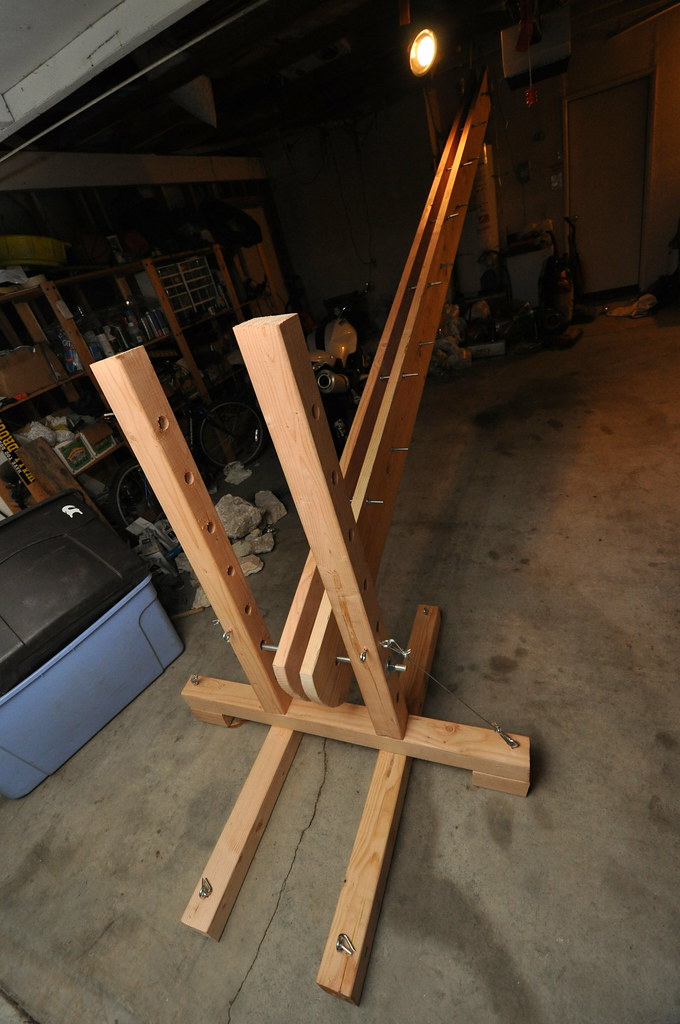
The crack machine itself is constructed with: |
|
|
Thats kinda of what i was looking for.... |
|
|
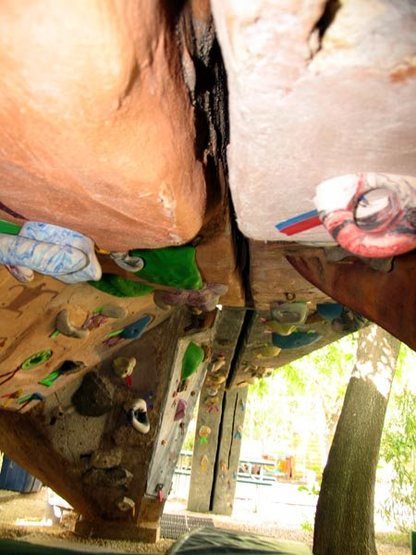
sunder wrote:Thats kinda of what i was looking for.... The last picture was a little disturbing... Looks like he is climbing without a head!He is not actually headless:  Though I can't vouch for what's in that head. |
|
|
It looks like he is using leather gloves right? |
|
|
He is, indeed, wearing leather gloves. For whatever reason, jamming wood is pretty painful without protection. |

|
Hey Chris D....you should post those photos over in this other thread that has kind of become the housing place for all of the MP Woody photos: |
|
|
sweet |
|
|
|
|
|
Thanks for all the beta |
|
|
Just built one using this beta. Pics to follow. |
|
|
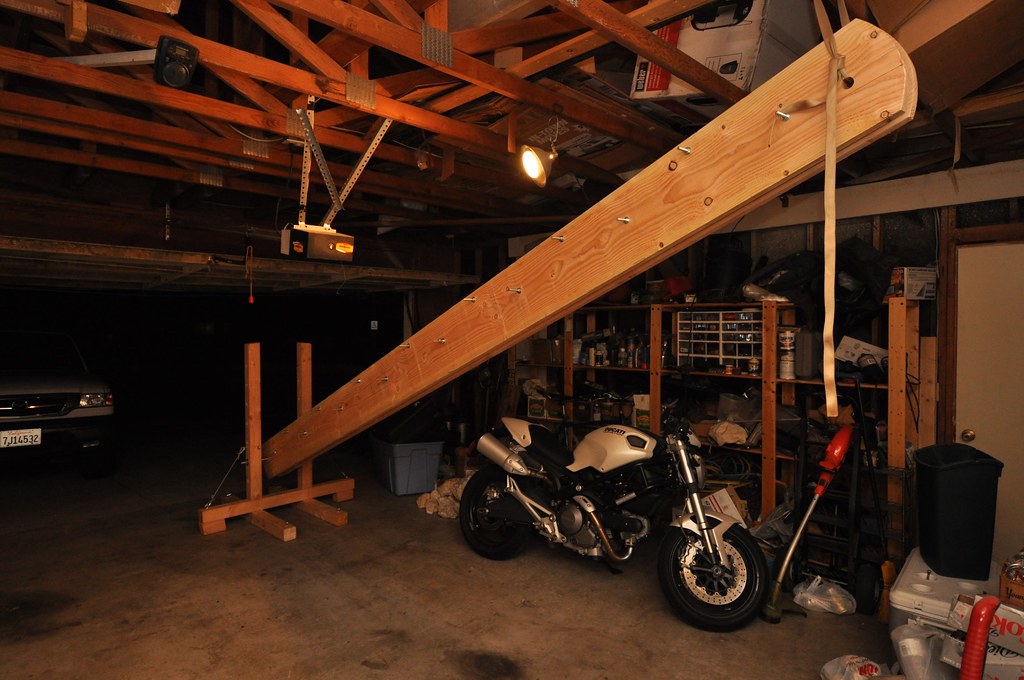
Chris D wrote: This took me two evenings after work to build and cost less than $120. It's made with two 16-foot 2X10s. I can't even climb it, but I've got a picture of Rob working it below. He Man, i just see your home crack, and tomorrow i will start to built mine, just like yours. (Im from Chile!) B.H |

|
Chris D wrote: He is, indeed, wearing leather gloves. For whatever reason, jamming wood is pretty painful without protection. Wait, that didn't sound so good. Then why is he barefoot?! |
|
|
If you have to climb it with leather gloves, does the skill translate to real rock? |
|
|
 |
|
|
Russ Keane: with the 'invention' and seems to be acceptance of 'hand jammie' crack designed gloves a few years ago, I'd say that it's now the norm for serious crack climbers to use some device to save the tape glove daily construction time and money. Decades ago I took a thin pair of all leather work gloves and cut off the finger tips, just so I could hand jam and save skin off the back side of my hands on certain climbs. I'd say for trad climbing, we ALL became 'aid' climbers or cheaters the day we chose to use Friends cams in late 70's and any fancy device ever since then. Or we just go with the flow and figure it's part of the sport. I certainly enjoy a comfy designed harness these days instead of a wrap around swami belt for my rope tie in from long ago. |
|
|
Chris D wrote: The crack machine itself is constructed with: (Everything can be bought at Home Depot) 2 16-foot 2X10 green douglas fir boards 5 pieces of 3/8 in. threaded rod (each cut into three equal-length pieces to make 15 smaller threaded rods) 30 3/8 in. wing nuts 30 3/8 in. machine nuts 60 3/8 in. regular washers (or 3/8 in fender washers) Stand: 1 3/4 in. threaded rod 4 3/4 in. washers 4 3/4 in. nuts 3 8-foot 4X8 boards 6-inch lag bolts Cable guy-lines optional (probably overkill) The rest you should be able to glean from the photos. You can build this with a measuring tape, a drill (with a 1-inch "chisel" style wood bit), a hacksaw, a wood saw and a crescent wrench. It's a lot easier to build this if you have a jigsaw, an angle grinder, a couple of sawhorses, a socket set, and a good file. Be aware that it's tough to transport the materials without a pickup truck, and when you cut/grind/file the threaded rods, be sure that you have a machine nut on the rod behind where you're cutting it. That way, you can cut, grind, and file the end of the rod, then remove the nut. If you skip this step, you'll never get a nut onto the threaded rod. You'd probably be equally well-served building a small crack that you can do pull-ups in, but if you want to actually climb, this is an option. Some people put a lot of work into adding friction to the crack machine with special paints and grits. Read a lot about making a crack machine and the ideas behind their design here . Hey Chris. After a few years of using that inclined crack, how did it fare? Anything you would do differently now? I am gearing up to make my second basement roof crack and love the idea of this one. One thing comes to mind after using my first one: I would have tried to add less, if not zero, wooden spacers and gone for all threaded steel rod spacers with nuts and washers. It just allows for so much more freedom while limbs are moving inside the lanes. Regarding your use of threaded rod spacers: How did the spacing work out? I see you have them staggered "high and low". Was that effective? Did you notice warping or bending or was the wood pretty solid? Thanks! |