
 Continue with onX Maps
 Sign in with Facebook


The Incision, A2
|
|
I’d been looking for a nailing route to do for a bit but found mostly A3 routes at index and in Squamish. Seems like most of the once A2 routes have since been climbed clean or freed. But this line seemed like a good first and I’d finally managed to convince a friend to come and give me a belay. The only info on mountain project was from 2015 but the bolts were allegedly good as of then but there were no chains. When I got to the base I looked up and saw what I thought were chains on the anchors 115 feet above. Thanks to whoever replaced the anchor bolts and added chains! The climb starts with some slopy free climbing that isn’t too hard if you can find the holds buried in the moss, I went up with no gear and spent a few minutes cleaning dirt and moss of of foot and hand holds. Then I went up with just a few pins, a hammer, and a bite of rope. I whacked a lost arrow and a knife blade in, equalized them on a sliding x, clipped the rope, then down climbed to grab my harness and rack up. 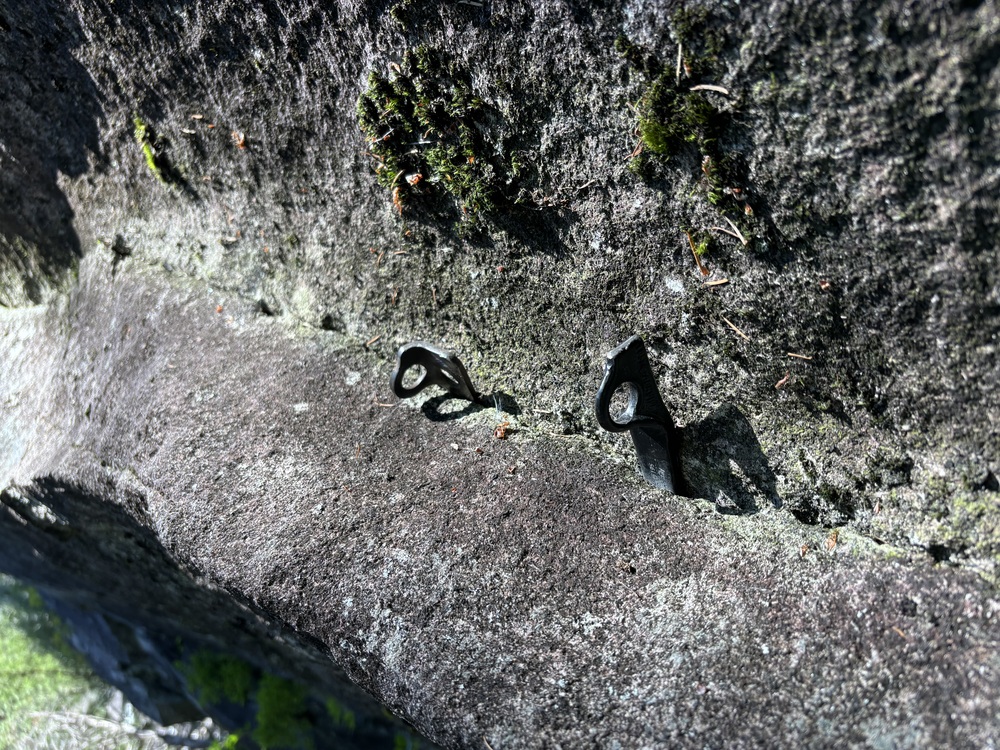 Having never hammered a piton before I was a little scared of how good a job I had done, I had hammered until the pitch stopped changing but the LA stuck out about an inch. Once safely back on the ground my friend and I both grabbed the rope and bounced and pulled on the two pitons as hard as we could and didn’t see anything move. Seemed good enough for me. With all my gear, I did the mossy free climbing up to my first 2 pins once more and clipped my ladder into the KB, put one foot in it to bounce it while still gripping a crimp, and watched it slip down and come partially out of the crack. Not what I had hoped for, I clipped my ladder into the LA and after a few bounces was satisfied with it so I began looking for my next piece, an orange ball nut and I was off! In my opinion the first third of the climb was the scariest because the crack was extremely thin and in a corner and all I could think of was zippering gear if I fell. I used a lot of ball nuts, one more LA, a few small brassies and a .1/.2 offset cam until I got up to a flake on the left that I spent about 3 minutes cleaning dirt out of and was happy to find 2 spots where I could place .4s, a sigh of relief. 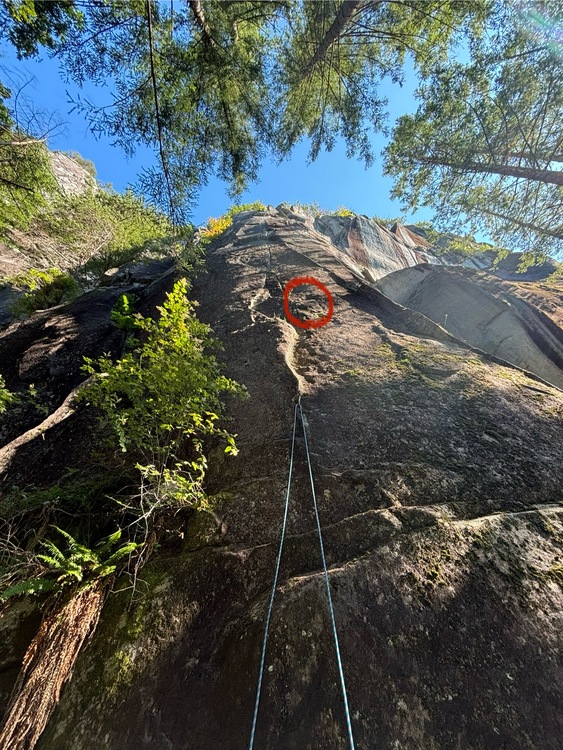 After that there was a ~3.5’x3’ detached flake (seen above in red), I broke a ~8”x6” section off seemingly by breathing on it and I could tell that the rest was gonna come off soon. Not wanting to do that on lead, I carefully found a few brass nut moves and a ball nut and I was just short of the “good” crack. One scary hook move and I was able to bang in a #2 tomahawk that wasn’t going anywhere, I got a solid blue ball nut above it then once I was above those, I equalized the pieces with a sliding x and a screamer. 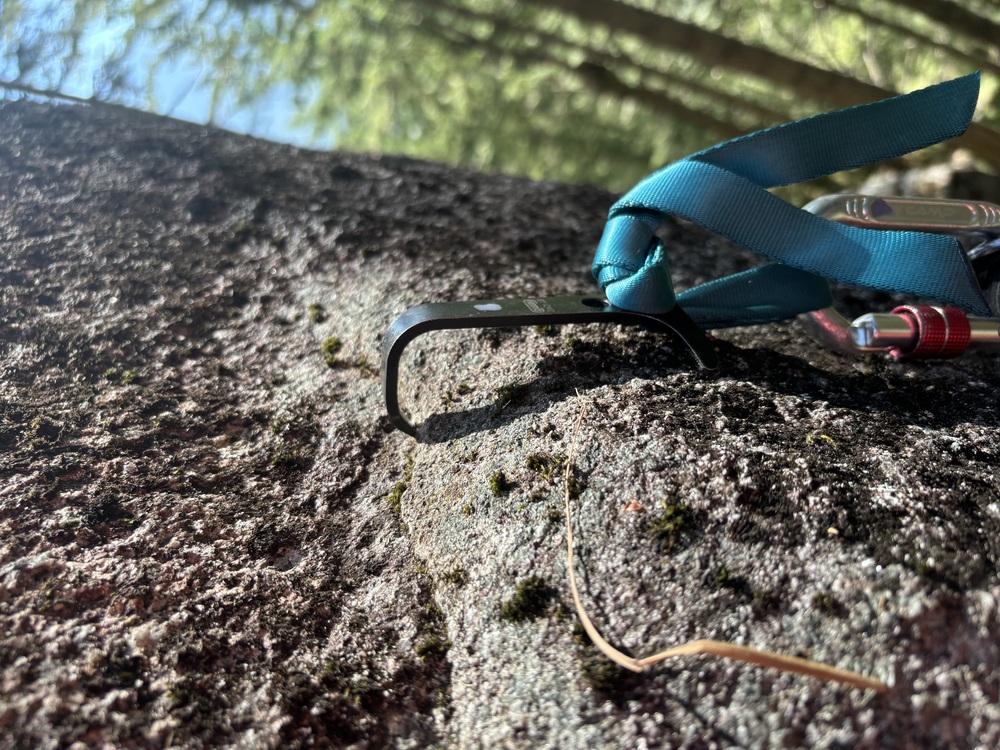 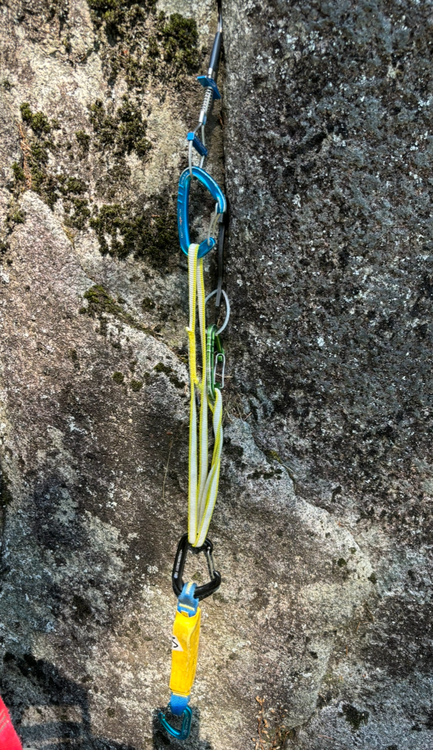 I put a narrow cam hook on each ladder and started working my way further up the crack. If I was ever unsure of a cam hook, one or 2 taps with the hammer soothed my nerves. A few feet up the crack there was a fixed beak from some previous climber, I bounced it and it seemed good, not too rusty so I left a draw for pro. When I got scared with how high I was above my last piece, I would tap in a beak, a bigger brass nut, or a ballnut. It was going great until I dropped on of my narrow cam hooks, luckily the wide I had fit fine in all the placements too so I blazed on with one wide and one narrow. I banged in one more KB and once again it moved when I bounced it so I took it out, put in a #1 tomahawk and was inspired by how much I had bounced it and how it had not moved at all. After the mini roof, a few more cam hook moves led to a left facing corner as well as a slightly hollow-ish but still solid flake left that would finally take cams, gray C3, black totem, #2 C4, #3 tomahawk, then a .5 C4 and red C3 and I was clipped to the anchor chains. It had taken me just about 2 hours in the dot to lead the 115 foot pitch. 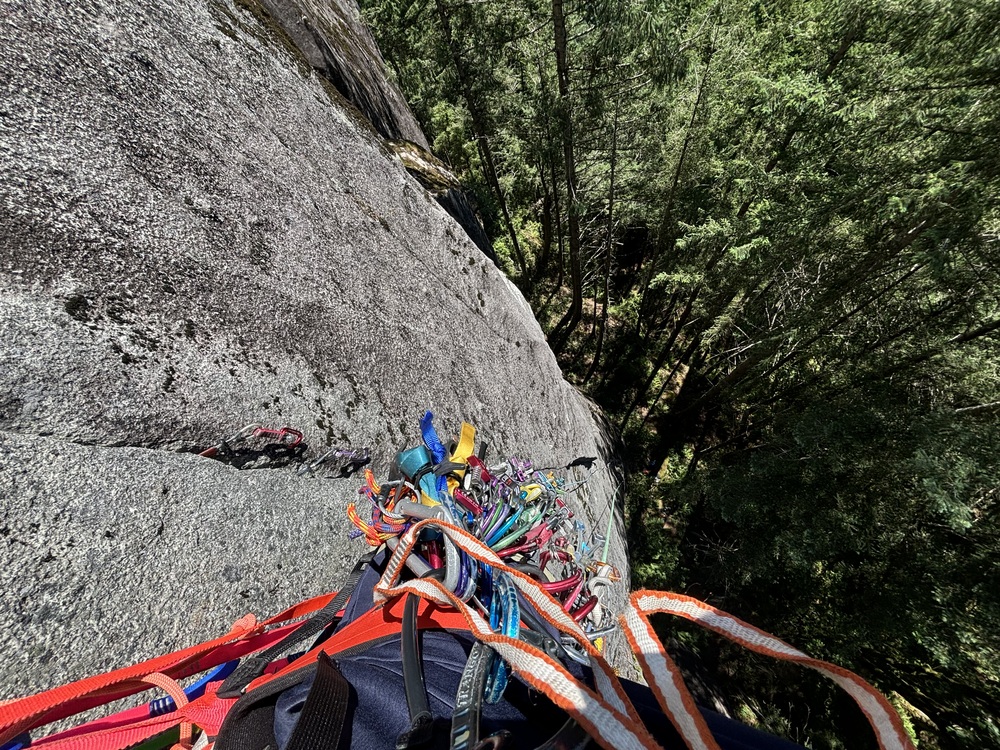 the view from the top. A scary but fun first nailing route. I fixed the line, rappelled down, and stopped at the detached flake, I was just planning on seeing if it would have been fine to use but next thing I knew the entire flake was in the air… Once in the ground I thanked my belayer and began to jug the line to clean gear. This part was great, almost perfectly vertical, I never had to unclip an ascender from the rope to pass gear. Everything I placed came out easily but not too easily. Having a hammer to clean nuts was a game changer. 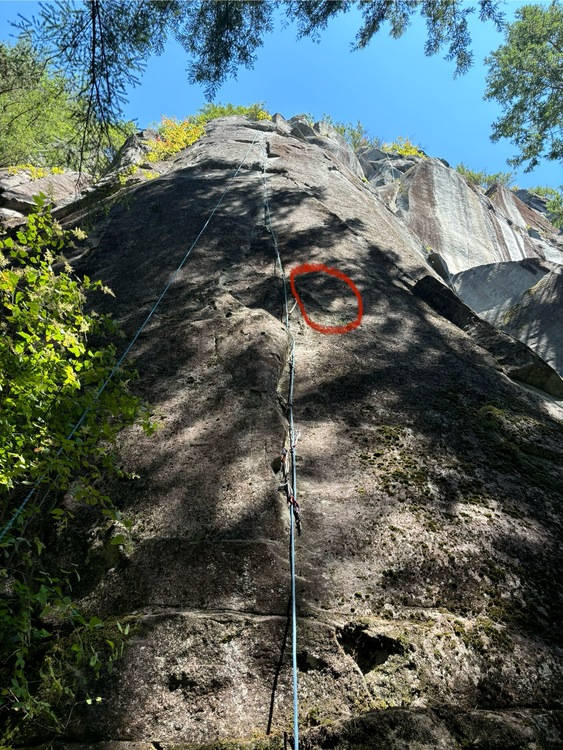 Of the one hour spent cleaning the climb, probably about a third of that time was spent on trying to get the fixed beak out. The reason it took so long was because it seemed to be some kind of ice piton with an extremely long nose with teeth (seen on the right in the gear pic below). Thoughts on gear: I with I had more orange ball nuts, and .1/.2 offset cams and another set of micro offsets brass nuts. I could definitely have used those in more than one occasion higher up. I also could have used more beaks than I placed, especially down low I didn’t place any. Below is the gear I placed on the climb. I brought a few more #1 beaks as well, a selection of KBs and LAs, a double from small to .4 then a single from .5-2 (I know I need to add racking loops to my beaks, I promise I will soon). 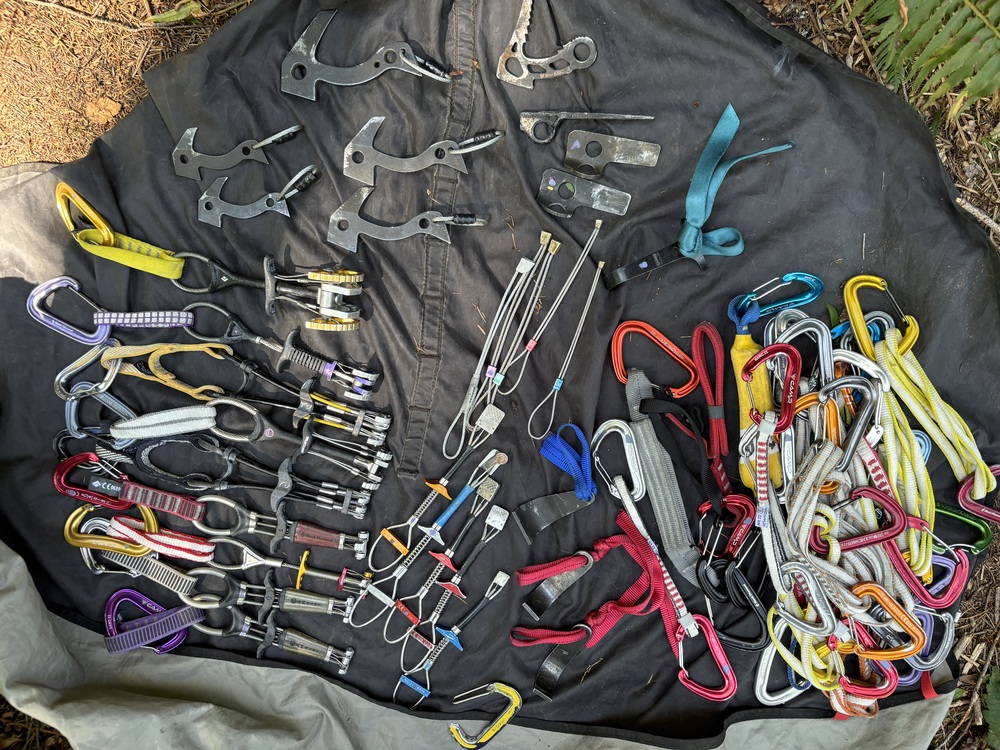 I even broke a carabiner trying to funk out the fixed beak… 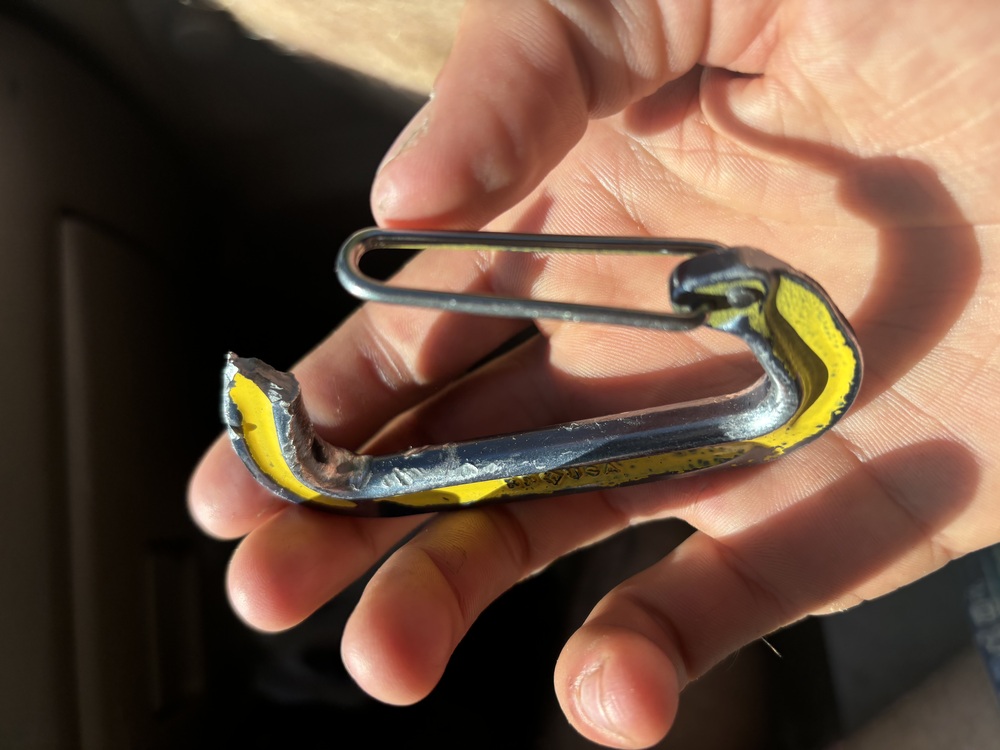 |
|
|
If anyone with more nailing experience wants to weigh in, I’d love to hear your thoughts on picking the right KB for a crack, I found ones that went in about 2/3 of the way than hammered them until the pitch stopped changing but as mentioned in the main post, 2 of my 3 still moved. Should I use a longer KB in that case? |
|
|
Kevin DeWeese wrote: Ya, I can see why, I was shocked at how long the “nose” was when I finally got it out… |

|
Sick! Keep nailing this route, people! |
|
|
"If anyone with more nailing experience wants to weigh in, I’d love to hear your thoughts on picking the right KB for a crack..." Yeah, pick a pecker, not a knifeblade. I climb a few hard big wall nailups each year, and I don't remember the last time I placed a blade. Sounds like good ankle-breaker territory down low. Did you not equalize the two first pieces? Make sure you tie cleaning/racking loops through all your beaks! Do you have a copy of our book HOOKING UP yet? If not, now's the time! You are guaranteed to save enough time, energy, heartache and money to completely underwrite the cost of the book many times over. |
|
|
Yeah, pick a pecker, not a knifeblade. I climb a few hard big wall nailups each year, and I don't remember the last time I placed a blade. Sounds like good ankle-breaker territory down low. Did you not equalize the two first pieces? Makes sense, I wasn’t sure since i hadn’t used beaks much except a few hand placements where I wasn’t super confident in them. After this route I am a lot lot confident in their ability to hold weight. I did equalize the first 2 pieces and yarded them with my friend from the ground but with the dynamic rope, it’s probably less force than bouncing with the ladders.
What diameter cord/type of nylon webbing do you recommend using? And yes, I got the book earlier this year and it’s already been super useful. I want to have some sort of idea what to do before aiding and getting myself hurt… |
|
|
Awesome! You’re following an old Index tradition by going there alone and banging stuff into unclimbed cracks. A few of us Seattleites used to do the same thing 50 plus years ago when most of the cracks were unclimbed and calling us with their sweet siren song. BTW The worst falls I’ve ever taken were from fukkin’ knifeblades. Beaks are a HUGE improvement but, unfortunately, weren’t available when I did most of my flying. |
|
|
Don Harder wrote: Not quite unclimbed but the last info I could find on it was from someone who nailed it in 2015, seems like someone replaced the anchors since though but a decent amount of vegetation had grown in the cracks so I assume it has been quite some time since someone climbed this. I definitely want to climb some of the more obscure nailing routes though.
Good to know, I think I’ll keep the KBs mainly for horizontal cracks and pick up a few more beaks for the vertical ones. |


