Almost 2 years ago, around Christmas time, I set out to build my own home wall with the help of some good friends. It was something I had always wanted to do since buying my house, and it was winter in the Midwest, so I was ready for a project. Also fueling the desire to build was my dislike of climbing gyms in general, especially my local gym. When you have a woody, you can climb anytime; there are no rules and no Christian rock music.
At this point I have been climbing on it for a while and right now it is all cleaned up, so I thought I would share some thoughts about the build to hopefully inspire others to take the plunge and put one up! It’s totally worth it, if you have the right space. You don’t need a plan! Just start building.
Specs:
~750 t-nuts total. About 120 per 4’ x 8’ sheet
37 deg. Overhang, with vertical section as well
7 sheets of plywood total
15’ from beam to floor
~$700 in materials including everything but the holds
I don’t claim to be an expert in construction, but you really don’t have to be to build a woody. It is very simple and takes more effort than skill. Living in an A frame house, the structure was already there, so much of the structural work was already done for me. The catch is that it would be installed right in the middle of my house in a loft area and I would see it every day, so it was important to me that it wasn’t an eye sore.
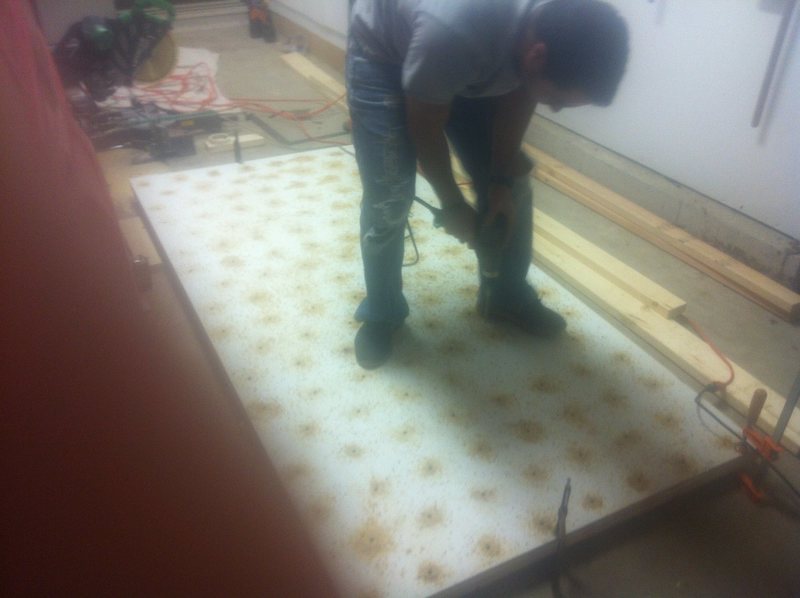
Starting out with a blank slate
First studs up
first sheets up
first climb
Tips for the first time builder:
-Use quality materials. Go for the more expensive thick plywood. Don’t use OSB or thin crap. Tongue and groove material works great and adds a ton of strength. No flexing!
-Drill your holes from the back of the material and take your time. It is very important that they are drilled straight.
-Take your time and make an even pattern with plenty of t-nuts on each sheet. I used an even 6-8” spacing pattern. It takes longer to install more t-nuts, but you won’t regret it later when you have more route setting options. As you will find out, sometimes t-nuts blow out for various reasons. More is better…
-If you have multiple identical sheets like I did, simply stack them up and drill all at the same time. It saves time and makes the spacing come out nice.
-Hammer in the t-nuts and secure with an extra small ½” long screw holding it in place. This step takes time but is worth it IMO if the back of your wall will be inaccessible. It ensures they stay in place better when holds are coming on and off.
-Caulk your joints before paint and make it look all pretty
-Finish off rough edges with good, thick trim. This not only gives it a finished look, but you can use the edges as holds without getting splinters.
-Measure twice, cut once.
-Don’t get caught up in too much planning before you start. Plans will evolve and change as you work and its only wood…
Materials:
I sourced most of the materials from Home Depot and Menards. HD rents great pickup trucks for 20 bucks so you can get all the material back home. I used simple 2x4 studs of varying lengths and ¾” tongue and groove plywood. The tongue and groove plywood is great because it fits together like a puzzle. Not only does it give you a very stiff/strong wall, it also makes it very easy to place the heavy pieces shorthanded, if you plan ahead. I started buying the t-nuts from Menards, but quickly realized that they could never meet the demand, so I ordered a big bag online for cheap. Amazon.com was the source (1,000 for less than $80).
drilling 3 sheets at once
t nuts with set screws
Structure:
My wall is built on the inside of roof joists, so obviously way overkill strong. But if you don’t have this type of structure in place, consider sticking to well known building techniques. Minimum 2x4 or 2x6 supports 16” on center. When in doubt, add strength. Not only do you want to have a strong wall with minimal flex when it’s complete, but you want it to stay that way for many years. I highly recommend using the screws with Torx bit heads. This is a very drilling and screwing intensive type of project…
Paint:
I was unsure what to use, as there are many conflicting opinions on the matter. I started with primer before the sheets went up. After all the panels were up and the trim was on, I used some caulk and drywall filler to clean up all the joints and gaps. I ended up using normal interior flat house paint with no texture added. The holds do not stick or spin and I am happy with it. Texture can be nice, but it tears up your skin and shoes. I enjoy climbing mostly barefoot on the wall anyway. Realistically, the paint is going to get marked up anyway so make it a thin coat. Don’t slop it on and make sure it has several days to dry before putting your first holds on. Also, take care not to fill in your screw holes with paint in case you need to make changes later or take it down.
caulk prep
more caulk prep
paint finished
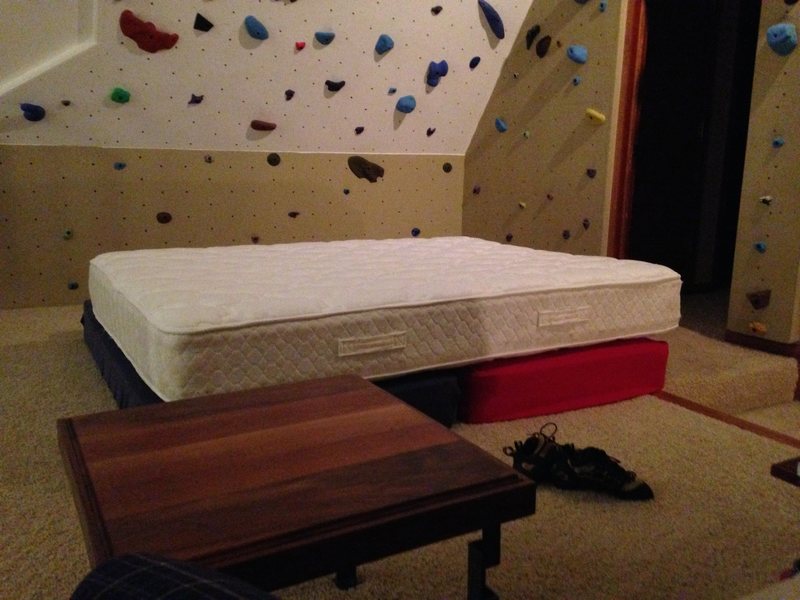
Fall protection:
I went with old mattresses. They were free and work great. After I started pricing out real gym pads, it was clear that was way more money than I was willing to spend. Just get a few mattresses preferably nice thick high quality ones.
crash pads
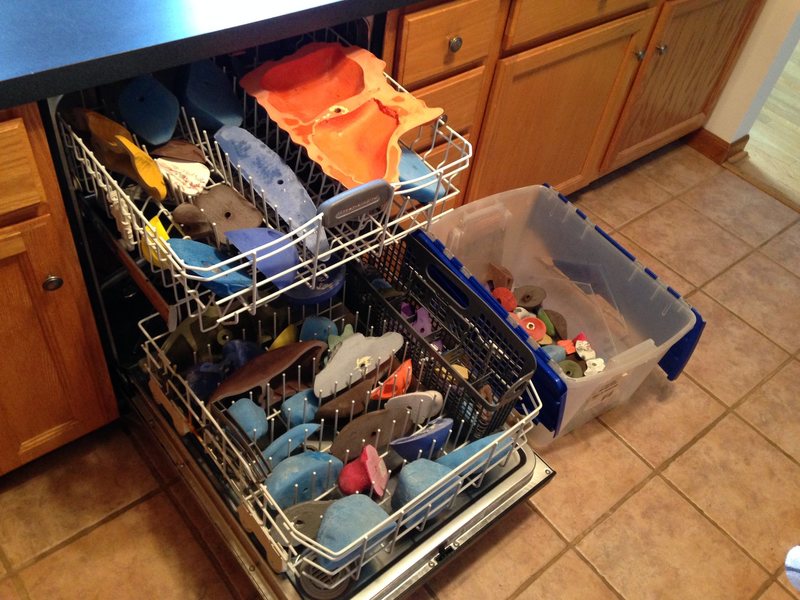
Holds:
I acquired them over time. They are a major part of the expense, so don’t forget to budget for them. My first sets I got at Erehwon and they were generic Metolius brand. I needed some right away... Part of the fun is climbing on it after you set the panels. Having holds while you are building can also help you set the panels. My wall was totally usable each step of the way once panels were up. I also sourced holds from Climb it, E grips, Atomik and Nicros. Obviously, I still need more holds, but that is part of the fun. You always need more holds than you think! To clean the holds I just run them in the dishwasher. They come out looking new.
holds
Setting:
Route setting was somewhat challenging for me at first because it was something I had never done before. Don’t stress too much about it, just put the holds up quickly at first and make changes later. Part of the fun of owning a woody is doing a strip and starting over anyway.
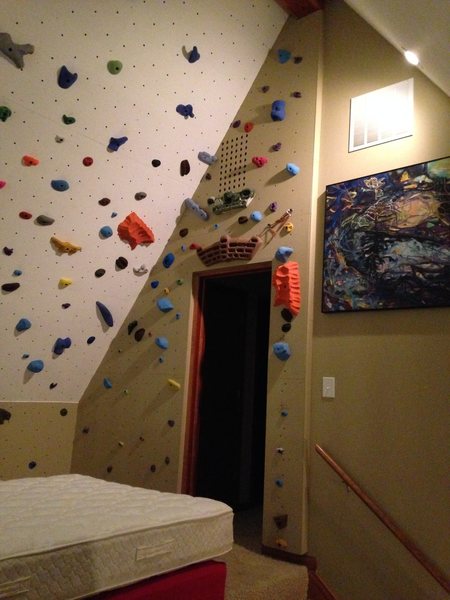
finished
...
...
Go build!

 Continue with onX Maps
 Continue with Facebook