
 Continue with onX Maps


All Locations >
Colorado
> Estes Park Valley
> Lumpy Ridge
> Bookmark
> 37th Cog in Melvin's… (5.8 5b 16 VI- 15 HVS 4c)


ID 107098844 ·
·
Copyright Violation?


Rate Photo

Mark Roth
Apr 11, 2011
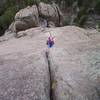
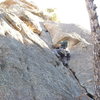
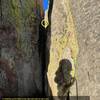
“Good advice in the comments, link P2 with the start of P3 (there is a great stance above where you can see in the photo). That way you can use a #4 for this crux and then use it again later, and skip the poor belay spot.”


0 Comments